Welcome to this blog post where we will explore how to disable the default domain “azurewebsites.net” assigned to an Azure Web App. When you create a web app in Azure, by default, it is assigned a subdomain of “azurewebsites.net” which is used to access your web app over the internet. However, in some cases, you may want to use your custom domain name to access your web app instead of the default one. In this blog post, we will walk you through the steps to disable the default domain and configure your custom domain name for your Azure Web App. We will provide you with detailed instructions and examples to make the process easy to follow. So, let’s get started and learn how to disable the default domain assigned to your Azure Web App.
Prerequisites :
- azure
- Having a domain name in go-daddy or Cloudflare
- Cloudflare Free Account
Use Case
Mr. X, the current team manager, has recently proposed an idea that the company website should only be accessible through a custom domain name. To achieve this, he wants to disable access to the default domain “azurewebsites.net” for our web app, similar to how we restrict access to our private web apps. The end goal is to ensure that our web app is accessed only through our chosen custom domain name, providing a more professional and consistent user experience for our customers. In this blog post, we will explore the steps to disable the default domain and configure a custom domain name for our Azure Web App, following Mr. X’s idea. We will provide you with a comprehensive guide, including practical examples, to help you achieve this with ease. So, let’s dive in and learn how to disable the default domain for our Azure Web App and configure a custom domain name.
Azure Web App Service
Azure Web Apps is a service provided by Microsoft Azure that allows users to deploy and manage web applications in a cloud environment. It provides a platform for hosting web applications, such as websites, web APIs, and mobile app backends, without the need for managing the underlying infrastructure. Azure Web Apps supports a wide range of programming languages, including .NET, Java, Node.js, Python, PHP, and Ruby, and provides integration with various tools and frameworks, such as Visual Studio, GitHub, and Docker. It also offers features such as automatic scaling, load balancing, and continuous deployment, making it a popular choice for hosting web applications in the cloud. With Azure Web Apps, users can focus on developing and deploying their web applications while leaving the management of the underlying infrastructure to Microsoft Azure.
Let’s assume you have already created the web app and now we are going to add domain name .
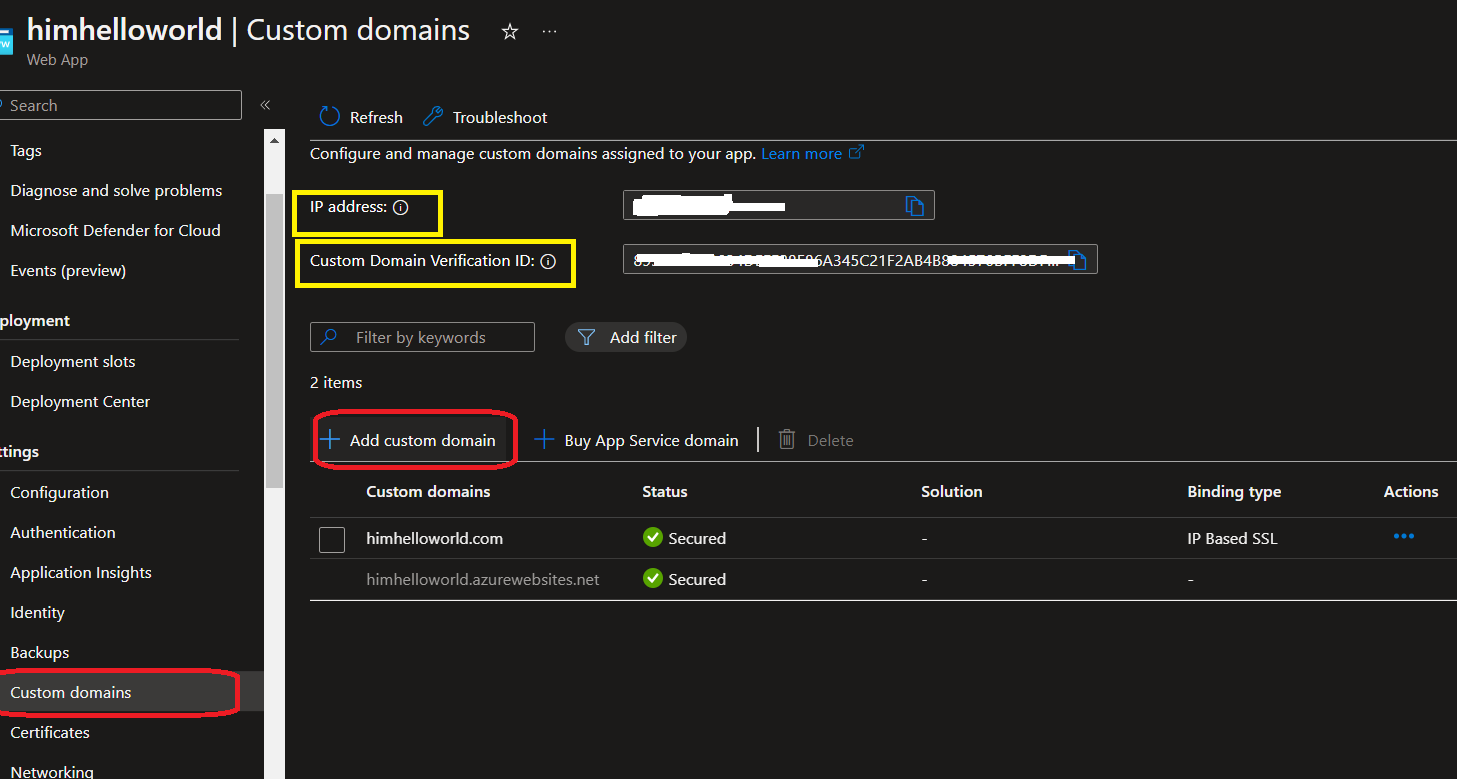
First step is to go to our web app and click on custom domains and click add custom domain .
Here you will be reeving this screen that will be given you host name records to be added to the domain provider.
Save the information because we are going to need them later .
Add godaddy Domain to CloudFlare
In order to add a domain to cloudflare we need to follow the following steps .
- Login to cloudflare
clique add a new site
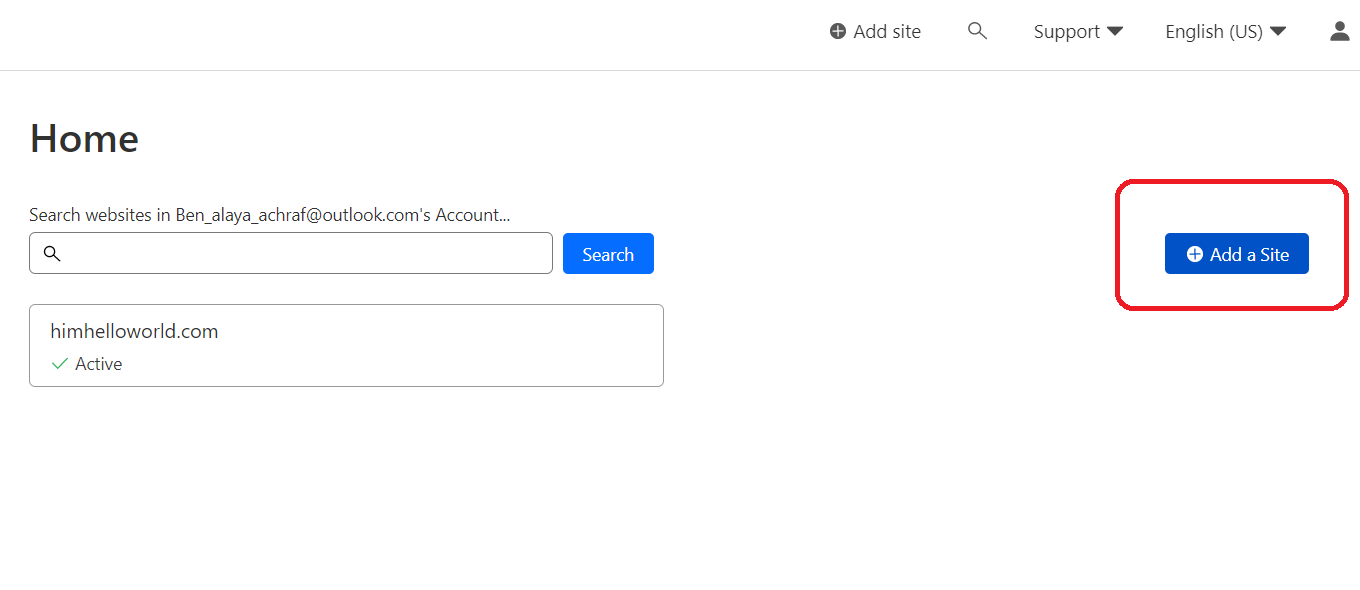 When you arrive at this point, you will be presented with a variety of plans to select from. As for me, I am currently utilizing the free plan; however, if you are a professional, it is critical to carefully consider your options and develop a well-thought-out strategy for selecting one of the available plans. This will ensure that you have all the necessary features and resources to accomplish your objectives.

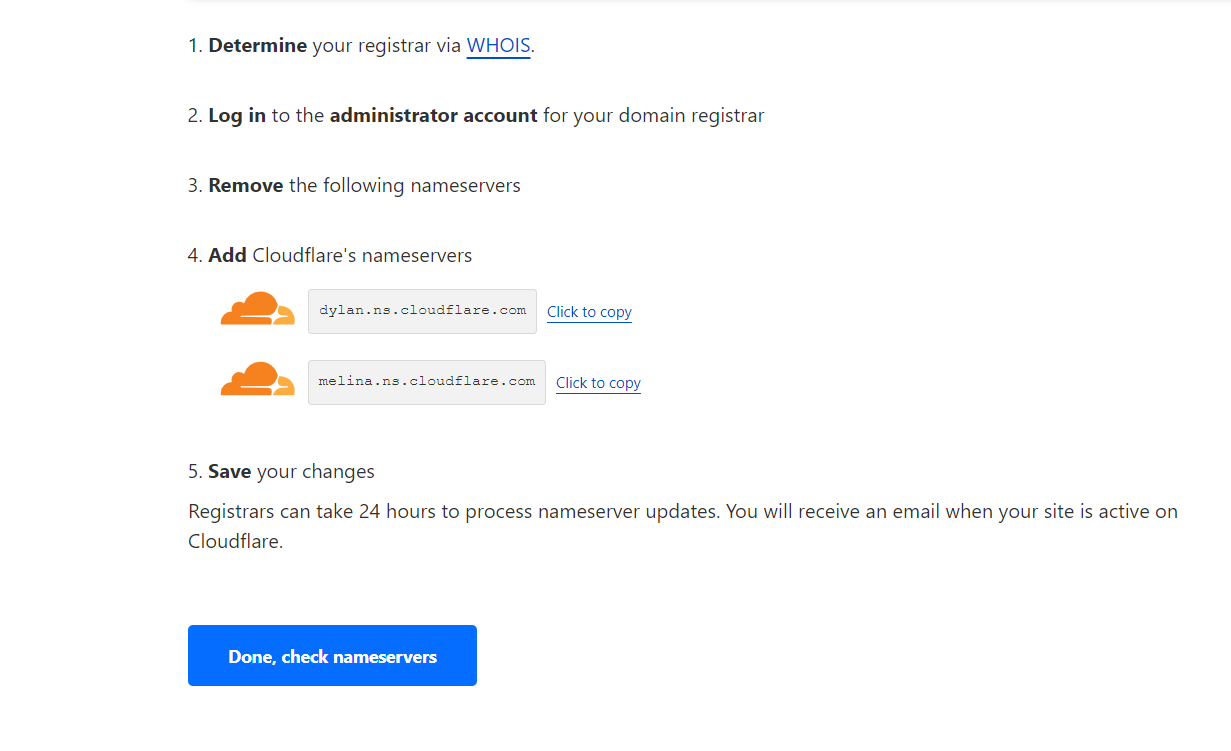
Now the first step is you will be asked to add Cloudflare name-servers and remove the existing one :
 For that we need to go to godaddy under our domain DNS , we need to choose Change name servers :

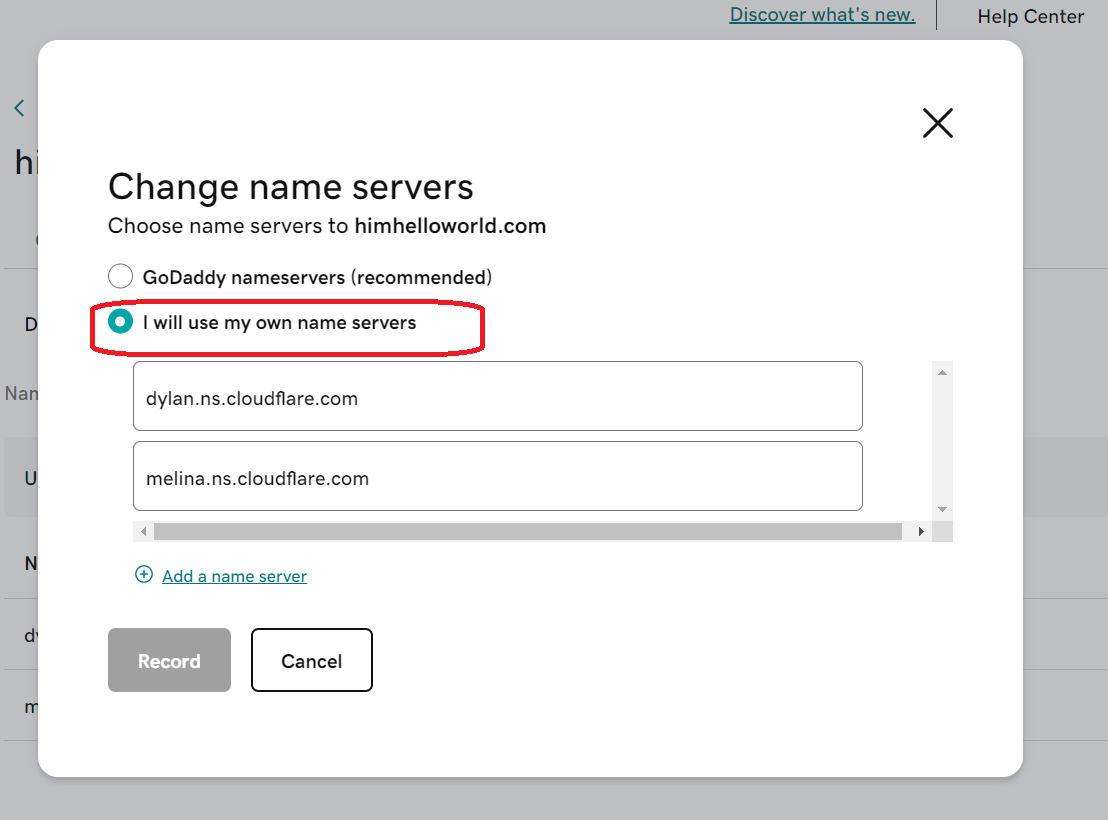 To be noted that registrations can take up to 24 hours to process nameserver updates and ou will receive an email when your site is active on Cloudflare.
When you site is active in Cloudflare it will look like this :
 Configure Cloudflare
- Now in the Dns Tab you will need to do he following configuration :
Add a A record that point to the ip adress of the web app or add a cname record that point to the azurewebsites.net - Add a TXT record that contain the asuid that was provided by the web app .the configuration will look like :
 Note : Cloudflare give free ssl with the site that’s why we have choosen the option IP based SSL
If we check the DNS now, in the normal case, we would expect to see the IP address of the web application. However, due to our domain being behind Cloudflare, the IP addresses we receive will be those of Cloudflare. This is because Cloudflare acts as a reverse proxy, routing traffic through its own servers before forwarding it to the origin server. As a result, the origin server’s IP address is obscured, and the IP address that appears in the DNS record is that of the Cloudflare server handling the request. This provides additional security and performance benefits, such as protection against DDoS attacks and caching of content to improve load times and this provided by cloudflare , we will not go deep here in security maybe in another blog post .
Configuring the web APP
Now after we have validated the domain name in our web app , we have two more step , which is denying access and allowing only the ip’s of Cloudflare .
To get the list of IP ranges of CLoudflare , you can use this Link : IP Ranges | Cloudflare
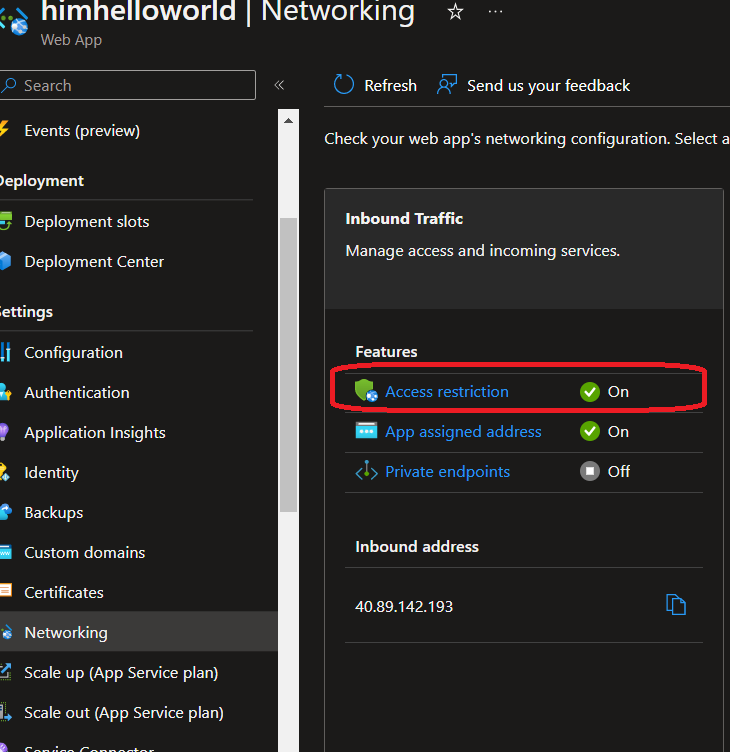 the first step is to deny access to all , and then add the ip range of cloudflare
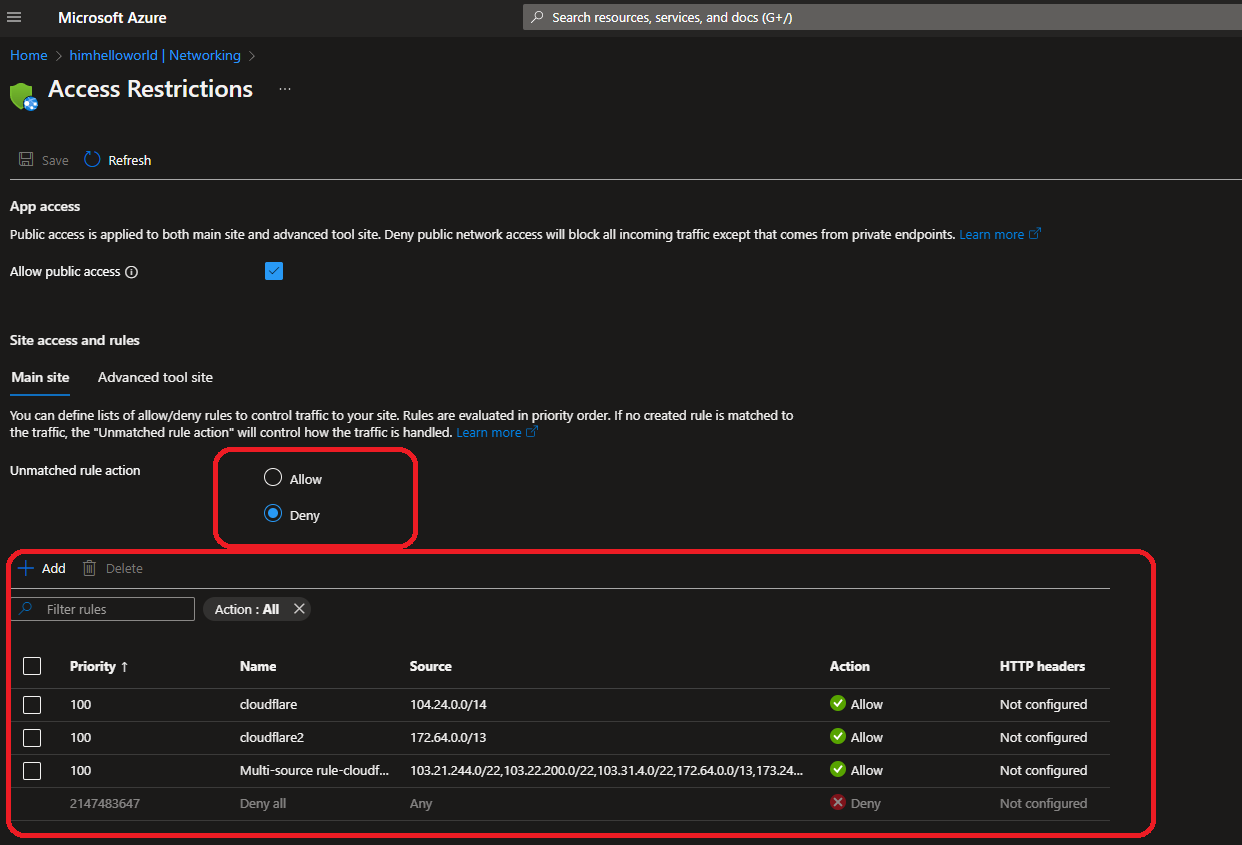 Simple Script to add the ip ranges :
$resourceGroupName = ""
$appServiceName = ""

Add-AzWebAppAccessRestrictionRule -ResourceGroupName $resourceGroupName  -WebAppName $appServiceName  `
  -Name "Multi-source rule" -IpAddress "103.21.244.0/22,103.22.200.0/22,103.31.4.0/22,172.64.0.0/13,173.245.48.0/20,188.114.96.0/20,190.93.240.0/20"`
  -Priority 100 -Action Allow
Result :
Here we have achieved our goal !
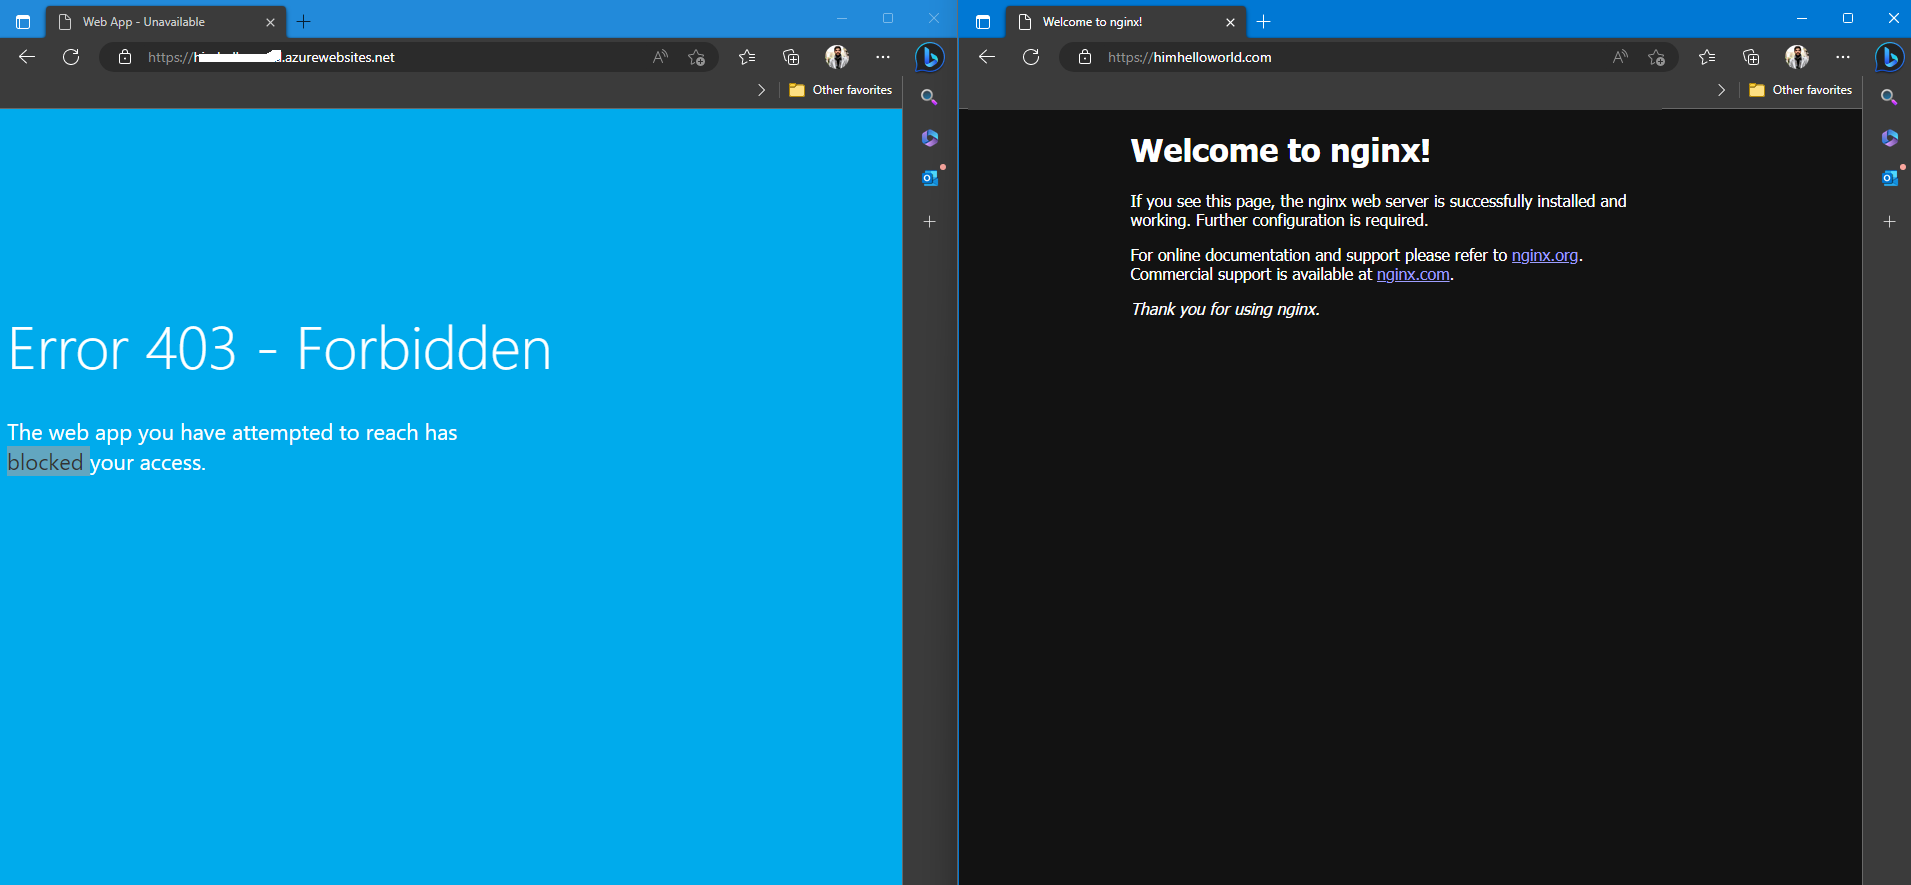 Some tools/urls that i have used :
Network Tools: DNS,IP,Email (mxtoolbox.com)
https://www.whatsmydns.net/
https://www.nslookup.io/
Note : This morning, I had the pleasure of enjoying a cup of coffee with one of my closest friends and mentors. During our conversation, he suggested that we explore using Azure DNS to host our domain and replicate the successful approach we’ve already taken but this time fully azure . This inspired me to incorporate this idea into my upcoming blog post, along with some additional measures to enhance the security of our web application. I’m excited to see how these new additions will elevate our online presence and better protect our users.








how to use that scripte ? i dont know how to use scripte and where
Hello mohamed , , the script is to use using powershell :
$resourceGroupName = “”
$appServiceName = “”
Add-AzWebAppAccessRestrictionRule -ResourceGroupName $resourceGroupName -WebAppName $appServiceName `
-Name “Multi-source rule” -IpAddress “103.21.244.0/22,103.22.200.0/22,103.31.4.0/22,172.64.0.0/13,173.245.48.0/20,188.114.96.0/20,190.93.240.0/20″`
-Priority 100 -Action Allow