It’s time to move on to a better strategy, which is ingress controller, and as an added bonus we will see how to add SSL certificate to have a secure domain. We have already seen how to setup nginx reverse proxy for aspnet core apps with and without Docker compose and How to setup nginx reverse proxy && load balancer for aspnet core apps with Docker and azure kubernetes service.
This article is a part of a series:
- Part 1 : How to setup nginx reverse proxy for aspnet core apps with and without Docker compose
- Part 2 :How to setup nginx reverse proxy && load balancer for aspnet core apps with Docker and azure kubernetes service
- Part 3 : How to configure an ingress controller using TLS/SSL for the Azure Kubernetes Service (AKS)
- Part 4 : switch to Azure Container Registry from Docker Hub
- Part 5: Using Azure DevOps, Automate Your CI/CD Pipeline and Your Deployments
- Part 6 : Using Github, Automate Your CI/CD Pipeline and Your Deployments
- Part 7 : Possible methods to reduce your costs
Introduction
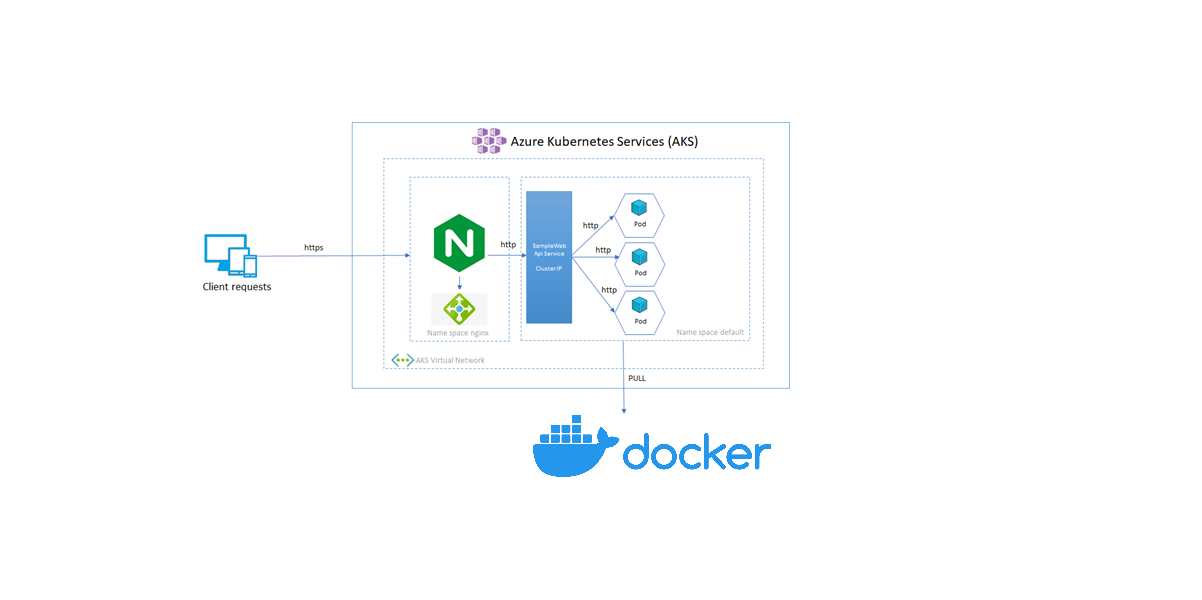
We created a nginx reverse proxy in a previous article; this time, we’ll employ an ingress controller.
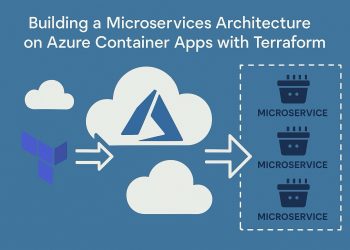
For Kubernetes services, an ingress controller is a piece of software that offers reverse proxy, programmable traffic routing, and TLS termination. Individual Kubernetes services’ ingress rules and routes are configured using Kubernetes ingress resources. A single IP address can be used to route traffic to numerous services in a Kubernetes cluster when ingress rules and an ingress controller are utilized.
In this demonstration, we’ll show you how to switch between four applications as services by using the ingress controller.
Later, we’ll look at adding an SSL certificate and switching (redirect ) from HTTP to HTTPS.
Part 1 : Create deployments in AKS
Using the docker hub, we will begin by defining the applications we will use in this context.
01-backend-deployment.yml
apiVersion: apps/v1
kind: Deployment
metadata:
  name: backend-restapp
  namespace: ingress
  labels:
    app: backend-restapp
    tier: backend
spec:
  replicas: 2
  selector:
    matchLabels:
      app: backend-restapp
  template:
    metadata:
      labels:
        app: backend-restapp
        tier: backend
    spec:
      containers:
        - name: backend-restapp
          image: ben2code/backend:latest
          ports:
            - containerPort: 5000
---
apiVersion: v1
kind: Service
metadata:
  name: my-backend-service ## VERY VERY IMPORTANT
  labels:
    app: backend-restapp
    tier: backend
spec:
  selector:
    app: backend-restapp
  ports:
    - name: http
      port: 5000 # ClusterIP Service Port
      targetPort: 5000 # Container Port
  type: ClusterIP
01-nginx-frontend.yml
apiVersion: apps/v1
kind: Deployment
metadata:
  name: 01-nginx-frontend
  namespace: ingress
  labels:
    app: 01-nginx-frontend
    tier: frontend
spec:
  replicas: 1
  selector:
    matchLabels:
      app: 01-nginx-frontend
  template:
    metadata:
      labels:
        app: 01-nginx-frontend
        tier: frontend
    spec:
      containers:
        - name: 01-nginx-frontend
          image: ben2code/my_build:v3-release
          ports:
            - containerPort: 80
---
apiVersion: v1
kind: Service
metadata:
  name: my-nginx-service-01 ## VERY VERY IMPORTANT
  labels:
    app: 01-nginx-frontend
    tier: frontend
spec:
  selector:
    app: 01-nginx-frontend
  ports:
    - name: http
      port: 80 # ClusterIP Service Port
      targetPort: 80 # Container Port
  type: ClusterIP
In the screenshots I’ll demonstrate, I’ll use two additional deployments of the same type as 01-nginx-frontend.yml, but with a different version (tag) on Docker Hub of the same container .
Now, before we deploy our applications, we will construct a namespace where all of our work will be gathered.
my-namespace.yaml
apiVersion: v1
kind: Namespace
metadata:
  name: ingress
using the following commands, you can deploy our applications:
kubectl apply -f ./my-namespace.yaml

kubectl config set-context --current --namespace=ingress

kubectl apply -f 01-backend-deployment.yml

kubectl apply -f 01-nginx-frontend.yml

kubectl apply -f 02-nginx-frontend.yml

kubectl apply -f 03-nginx-frontend.yml
Use the following command to view our running services (also you can use the azure portal)
kubectl get services --namespace ingress
 As you can see, we are using the ports that we have already set up to operate our services.
Part 2: Create an ingress controller in Azure Kubernetes Service (AKS)
In this section, we will install the ingress controller using a few command-lines .
Configuration :
# Add the ingress-nginx repository
helm repo add ingress-nginx https://kubernetes.github.io/ingress-nginx

helm repo update

# Use Helm to deploy an NGINX ingress controller
helm install app-ingress ingress-nginx/ingress-nginx `
     --namespace ingress `
     --create-namespace `
     --set controller.replicaCount=1 `
     --set controller.nodeSelector."kubernetes\.io/os"=linux `
     --set defaultBackend.nodeSelector."kubernetes\.io/os"=linux
Now, we can use the following command to view our ingress controller and the newly created public IP address:
kubectl get services --namespace ingress -o wide -w app-ingress-ingress-nginx-controller
![]()
apiVersion: networking.k8s.io/v1
kind: Ingress
metadata:
  name: webapp-ingress
  namespace: ingress
  annotations:
    nginx.ingress.kubernetes.io/ssl-redirect: "false"
    nginx.ingress.kubernetes.io/use-regex: "true"
    nginx.ingress.kubernetes.io/rewrite-target: /$1
spec:
  ingressClassName: nginx
  rules:
  - http:
      paths:
      - backend:
          service:
            name: my-backend-service
            port:
              number: 5000
        path: /
        pathType: Prefix
      - backend:
          service:
            name: my-nginx-service-01
            port:
              number: 80
        path: /webapp1(/|$)(.*)
        pathType: Prefix
      - backend:
          service:
            name: my-nginx-service-02
            port:
              number: 80
        path: /webapp2(/|$)(.*)
        pathType: Prefix
      - backend:
          service:
            name: my-nginx-service-03
            port:
              number: 80
        path: /webapp3(/|$)(.*)
        pathType: Prefix
  - host: yourdomaine.com # change the IP address here
    http:
      paths:
      - backend:
          service:
            name: my-backend-service
            port:
              number: 5000
        path: /
        pathType: Prefix
      - backend:
          service:
            name: my-nginx-service-01
            port:
              number: 80
        path: /webapp1
        pathType: Prefix
      - backend:
          service:
            name: my-nginx-service-02
            port:
              number: 80
        path: /webapp2
        pathType: Prefix
      - backend:
          service:
            name: my-nginx-service-03
            port:
              number: 80
        path: /webapp3
        pathType: Prefix
Let’s launch our Ingress now that everything is ready.
kubectl apply -f app-ingress.yml
Results :
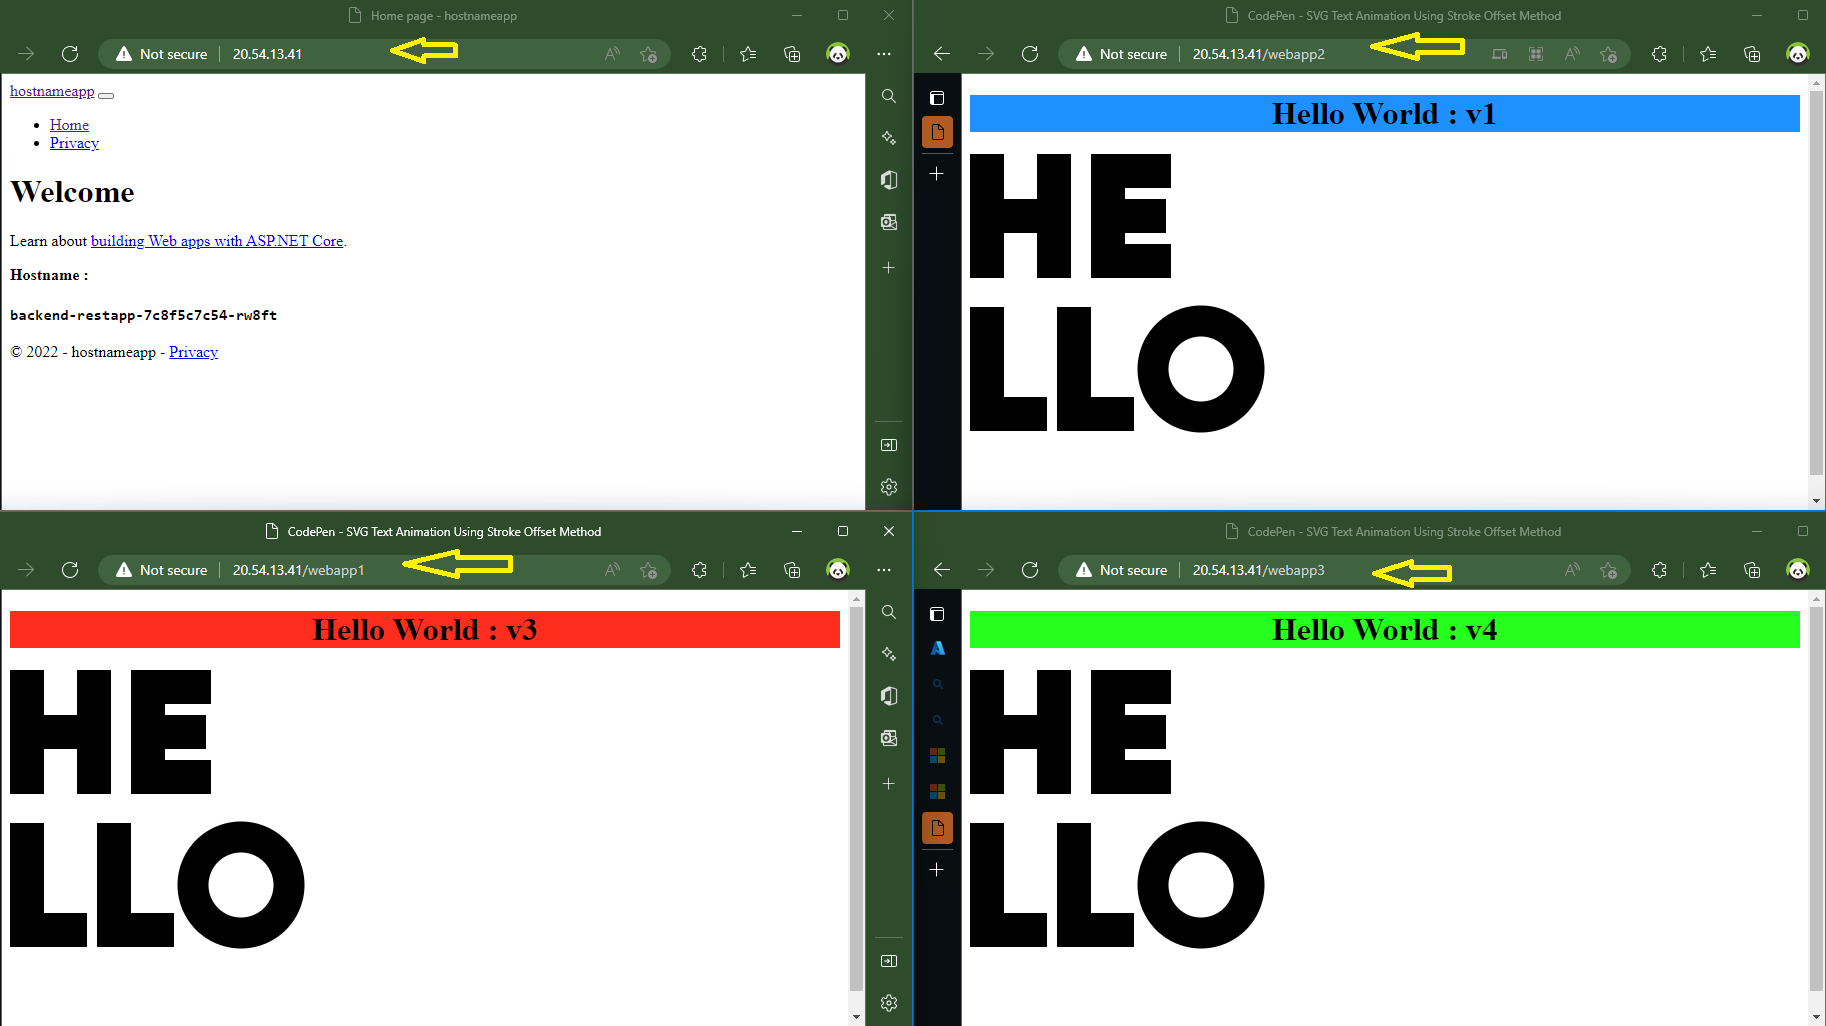
As you can see, four applications are displayed for the same entrance.
we used route traffic to each application ,traffic directed to EXTERNAL IP/webapp1 is forwarded to the my-nginx-service-01. Themy-nginx-service-02 service is used to route traffic to EXTERNAL IP/webapp2.
For the time being, this is good but not ideal. We want a secure domain via certificate, we don’t want to utilize an ip address to access our websites. the following section will explain it all .
Part 3: Custom domains
First, we’ll look at how to include Cutsom Domain in our sample.
If you remember we have use the cmd line : kubectl get services –namespace ingress -o wide -w app-ingress-ingress-nginx-controller , the results include an external IP adress that we will use in our domain registrar , in my case is godaddy .
All you have to do is to add a new record :
kind : HAS
lastname : @
Value : the ip adress of the ingress
ttl : Custom
seconds : 600
This is good, but we still need to make some changes to our app-ingress.yml.
apiVersion: networking.k8s.io/v1
kind: Ingress
metadata:
  name: webapp-ingress
  namespace: ingress
  annotations:
    nginx.ingress.kubernetes.io/ssl-redirect: "false"
    nginx.ingress.kubernetes.io/use-regex: "true"
    nginx.ingress.kubernetes.io/rewrite-target: /$1
spec:
  ingressClassName: nginx
  rules:
  - http:
      paths:
      - backend:
          service:
            name: my-backend-service
            port:
              number: 5000
        path: /
        pathType: Prefix
      - backend:
          service:
            name: my-nginx-service-01
            port:
              number: 80
        path: /webapp1(/|$)(.*)
        pathType: Prefix
      - backend:
          service:
            name: my-nginx-service-02
            port:
              number: 80
        path: /webapp2(/|$)(.*)
        pathType: Prefix
      - backend:
          service:
            name: my-nginx-service-03
            port:
              number: 80
        path: /webapp3(/|$)(.*)
        pathType: Prefix
  - host: himhelloworld.com # adding domain
    http:
      paths:
      - backend:
          service:
            name: my-backend-service
            port:
              number: 5000
        path: /
        pathType: Prefix
      - backend:
          service:
            name: my-nginx-service-01
            port:
              number: 80
        path: /webapp1
        pathType: Prefix
      - backend:
          service:
            name: my-nginx-service-02
            port:
              number: 80
        path: /webapp2
        pathType: Prefix
      - backend:
          service:
            name: my-nginx-service-03
            port:
              number: 80
        path: /webapp3
        pathType: Prefix
Now let’s deploy again and the results :
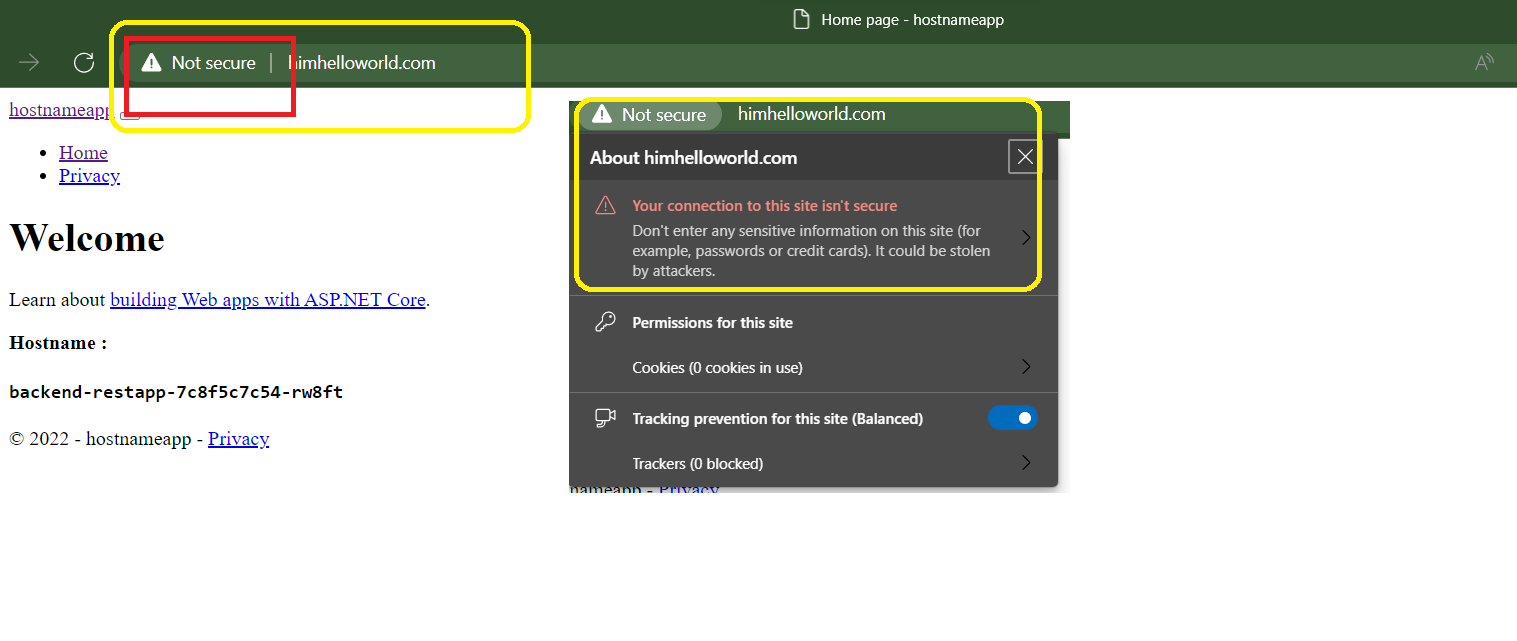 As you can see, our ingress domain currently lacks a certificate, making it insecure. In the next section, we’ll discuss how to add a certificate and force HTTP to HTTPS.
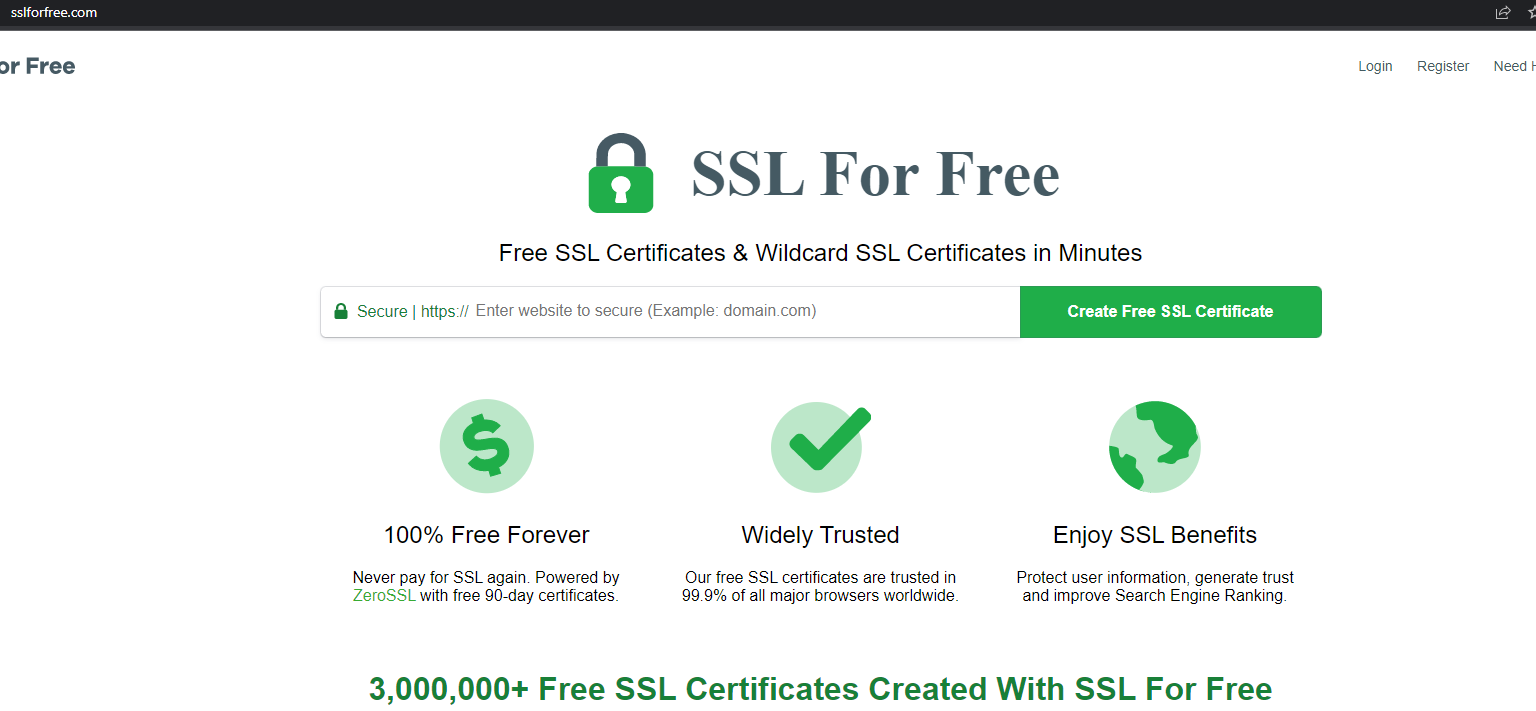
Part 3: Custom domains and SSL/TLS certificates
We will get a free certificate from SSLforfree for the demo’s purposes. You must purchase a verified certificate in order to use production environments.
In order to have the certificate you need to have acces to your domain .
next you will download the genrated certificate
 the next step is to merge .crt Files
Instructions
Method 1
you can use the cmd line to merge the crt files
cat certificate.crt ca_bundle.crt >> certificate.crt
Or : Right click on the first certificate and open it on the editor :
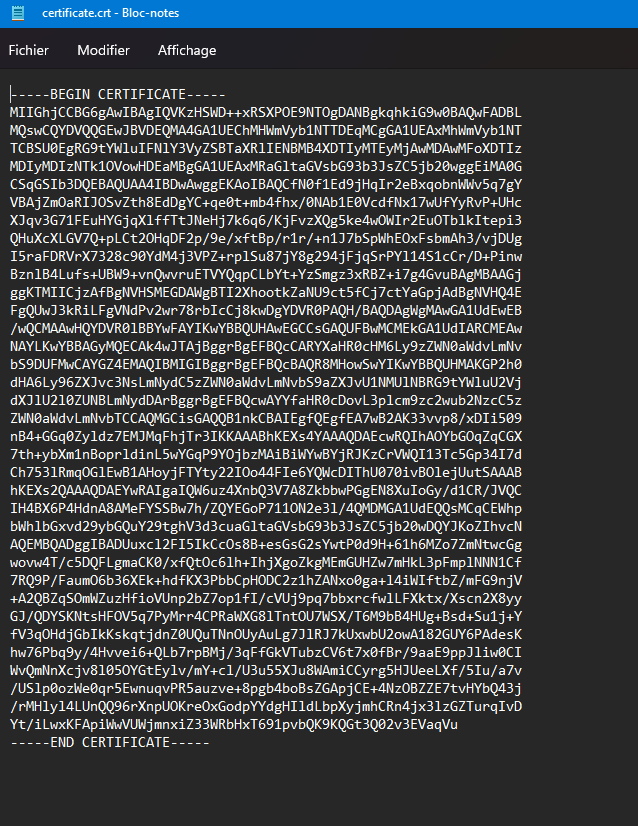
Insert the second certificate on a new line at the end of the document (after end certificate you will insert a new one that start with —–BEGIN CERTIFICATE—– and end with —–END CERTIFICATE—–)
Now you must save as one file .crt ,you should have everything you need to install the SSL Certificate on your system.
Now we will create a new Namespace that will contain our secret for the certification :
apiVersion: v1
kind: Namespace
metadata:
  name: cert-manager
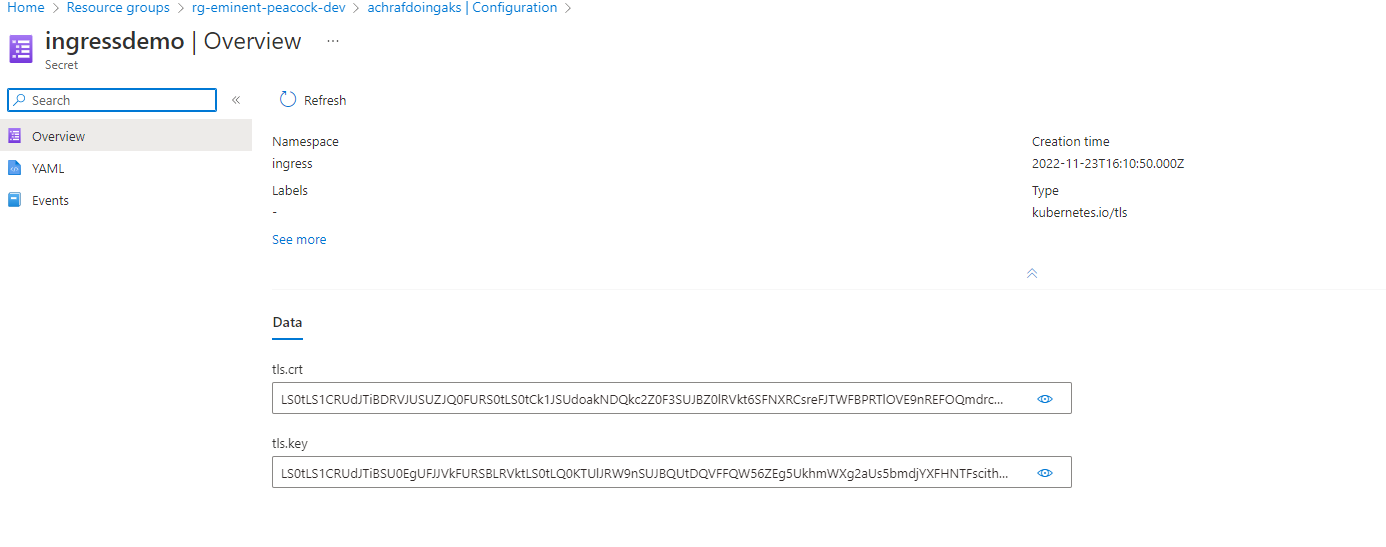
Now we can run the below command to create our ssl secret (ingressdemo ):
kubectl create secret tls ingressdemo --namespace cert-manager --key private.key --cert certificate.crt
there is another way to do this :
Method 2
cat tls.crt | base64
cat tls.key | base64
and then :
apiVersion: v1
data:
  tls.crt: LS0tLS1CRUdJTiBDRVJUSUZJQ0FURS0tLS0tCk1JSURKakNDQWc2Z0F3SUJBZ0lKQUw2Y3R2bk9zMzlUTUEwR0NTcUdTSWIzRFFFQkJRVUFNQll4RkRBU0JnTlYKQkFNVEMyWnZieTVpWVhJdVkyOXRNQjRYRFRFNE1USXhOREUxTWpJeU1Gb1hEVEU1TVRJeE5ERTFNakl5TUZvdwpGakVVTUJJR0ExVUVBeE1MWm05dkxtSmhjaTVqYjIwd2dnRWlNQTBHQ1NxR1NJYjNEUUVCQVFVQUE0SUJEd0F3CmdnRUtBb0lCQVFDbWVsQTNqVy9NZ2REejJNazMwbXZ4K2VOSHJkQlIwMEJ4ZUR1VjBjYWVFUGNFa2RmSnk5V28KaTFpSXV1V04vZGV6UEhyTWMxenBPNGtzbWU5NThRZVFCWjNmVThWeGpRYktmb1JzNnhQUlNKZVVSckVCcWE4SQpUSXpEVVdaUTAwQ2xsa1dOejE4dDYvVjJycWxJd1VvaTVZWHloOVJsaWR4MjZRaXJBcFFFaXZDY2QzdUExc3AwCkUxRXdIVGxVdzFqSE9Eb3BLZGxaRndmcWhFSHNmYjZvLzJFb1A1MXMwY2JuTld6MHNsUjhhejdzOExVYnhBWnkKQkNQdDY1Z2VhT3hYWWUxaWhLYzN4SE4wYSsxMXpBYUdDMnpTemdOcEVWeFFJQ3lZdVZld3dNb0FrcHNkdGEybwpnMnFTaDZQZzRHeFFabzRwejIwN0c2SkFUaFIyNENiTEFnTUJBQUdqZHpCMU1CMEdBMVVkRGdRV0JCU3NBcUZoCkpPS0xZaXNHTkNVRGU4N1VWRkp0UERCR0JnTlZIU01FUHpBOWdCU3NBcUZoSk9LTFlpc0dOQ1VEZTg3VVZGSnQKUEtFYXBCZ3dGakVVTUJJR0ExVUVBeE1MWm05dkxtSmhjaTVqYjIyQ0NRQytuTGI1enJOL1V6QU1CZ05WSFJNRQpCVEFEQVFIL01BMEdDU3FHU0liM0RRRUJCUVVBQTRJQkFRQU1wcDRLSEtPM2k1NzR3dzZ3eU1pTExHanpKYXI4Cm8xbHBBa3BJR3FMOHVnQWg5d2ZNQWhsYnhJcWZJRHlqNWQ3QlZIQlc1UHZweHpKV3pWbmhPOXMrdzdWRTlNVHUKWlJHSXVRMjdEeExueS9DVjVQdmJUSTBrcjcwYU9FcGlvTWYyUVUvaTBiN1B2ajJoeEJEMVZTVkd0bHFTSVpqUAo0VXZQYk1yTWZUWmJka1pIbG1SUjJmbW4zK3NTVndrZTRhWXlENVVHNnpBVitjd3BBbkZWS25VR0d3TkpVMjA4CmQrd3J2UUZ5bi9kcVBKTEdlNTkvODY4WjFCcFIxRmJYMitUVW4yWTExZ0dkL0J4VmlzeGJ0b29GQkhlVDFLbnIKTTZCVUdhEeFNvWVF0VnJWSDRJMWh5UGRkdmhPczgwQkQ2K01Dd203OXE2UExaclVKOURGbFl2VTAKLS0tLS1FTkQgQ0VSVElGSUNBVEUtLS0tLQo=
  tls.key: LS0tLS1CRUdJTiBSU0EgUFJJVkFURSBLRVktLS0tLQpNSUlFb3dJQkFBS0NBUUVBcG5wUU40MXZ6SUhRODlqSk45SnI4Zm5qUjYzUVVkTkFjWGc3bGRIR25oRDNCSkhYCnljdlZxSXRZaUxybGpmM1hzeng2ekhOYzZUdUpMSm52ZWZFSGtBV2QzMVBGY1kwR3luNkViT3NUMFVpWGxFYXgKQWFtdkNFeU13MUZtVU5OQXBaWkZqYzlmTGV2MWRxNnBTTUZLSXVXRjhvZlVaWW5jZHVrSXF3S1VCSXJ3bkhkNwpnTmJLZEJOUk1CMDVWTU5ZeHpnNktTblpXUmNINm9SQjdIMitxUDloS0QrZGJOSEc1elZzOUxKVWZHcys3UEMxCkc4UUdjZ1FqN2V1WUhtanNWMkh0WW9Tbk44UnpkR3Z0ZGN3R2hndHMwczREYVJGY1VDQXNtTGxYc01ES0FKS2IKSGJXdHFJTnFrb2VqNE9Cc1VHYU9LYzl0T3h1aVFFNFVkdUFteXdJREFRQUJBb0lCQUMvSitzOEhwZWxCOXJhWgpLNkgvb0ljVTRiNkkwYjA3ZEV0ZVpWUnJwS1ZwWDArTGdqTm1kUTN0K2xzOXMzbmdQWlF4TDFzVFhyK0JISzZWCi9kMjJhQ0pheW1mNmh6cENib21nYWVsT1RpRU13cDZJOEhUMnZjMFhGRzFaSjVMYUlidW0rSTV0MGZlL3ZYWDEKUzVrY0Mya2JGQ2w3L21lcmZJTVNBQy8vREhpRTUyV1QydEIrQk01U2FMV3p4cDhFa3NwNkxWN3ZwYmR4dGtrTwpkZ1A4QjkwWlByck5SdUN5ekRwRUkvMnhBY24yVzNidlBqRGpoTjBXdlhTbTErVk9DcXNqOEkrRkxoUzZJemVuCm1MUkFZNnpWVGpZV05TU2J3dTRkbnNmNElIOEdiQkZJajcrdlN5YVNVTEZiVGJzY3ZzQ3I1MUszbWt2bEVMVjgKaWsvMlJoa0NnWUVBMFpmV2xUTjR2alh2T0FjU1RUU3MwMFhIRWh6QXFjOFpUTEw2S1d4YkxQVFJNaXBEYklEbQp6b3BiMGNTemxlTCtNMVJCY3dqMk5HcUNodXcyczBaNTQyQVhSZXdteG1EcWJaWkFQY0UzbERQNW5wNGRpTFRCClZaMFY4UExSYjMrd2tUdE83VThJZlY1alNNdmRDTWtnekI4dU1yQ1VMYnhxMXlVUGtLdGpJdThDZ1lFQXkxYWMKWjEyZC9HWWFpQjJDcWpuN0NXZE5YdGhFS2dOYUFob21nNlFMZmlKakVLajk3SExKalFabFZ0b3kra1RrdTJjZAp0Wm1zUi9IU042YmZLbEpxckpUWWkzY2E1TGY4a3NxR0Z5Y0x1MXo3cmN6K1lUaEVWSFIyOVkrVHVWYXRDTnkzCklCOGNUQW1ORWlVMlVHR2VKeUllME44Z1VZRXRCYzFaMEg2QWllVUNnWUFETDIrUGJPelUxelQvZ1B3Q09GNjQKQjBOelB3U2VrQXN1WXpueUR6ZURnMlQ2Z2pIc0lEbGh3akNMQzVZL0hPZ0lGNnUyOTlmbURBaFh6SmM0T2tYMwo4cW5uNGlMa3VPeFhKZ1ZyNnRmUlpNalNaRXpHbXhpbEdISVE2MS9MZGdGVTg3WExYWHdmaTZPdW80cUVhNm9YCjhCRmZxOWRVcXB4bEVLY2Y1N3JsK1FLQmdGbjVSaFc2NS9oU0diVlhFWVZQU0pSOW9FK3lkRjcrd3FvaGRoOVQKekQ0UTZ6THBCQXJITkFYeDZZK0gxM3pFVlUzVEwrTTJUM1E2UGFHZ2Rpa2M5TlRPdkE3aU1nVTRvRXMzMENPWQpoR2x3bUhEc1B6YzNsWXlsU0NvYVVPeDJ2UFFwN2VJSndoU25PVVBwTVdKWi80Z2pZZTFjZmNseTFrQTJBR0x3ClJ1STlBb0dCQU14aGFJSUdwTGdmcHk0K24rai9BSWhJUUhLZFRCNVBqaGx0WWhqZittK011UURwK21OeTVMbzEKT0FRc0Q0enZ1b3VxeHlmQlFQZlllYThvcm4vTDE3WlJyc3lSNHlhS1M3cDVQYmJKQlNlcTc5Z0g5ZUNIQkxMbQo0aThCUFh0K0NmWktMQzg3NTNHSHVpOG91V25scUZ0NGxMQUlWaGJZQmtUbURZSWo4Q0NaCi0tLS0tRU5EIFJTQSBQUklWQVRFIEtFWS0tLdS0tCg==
kind: Secret
metadata:
  name: ingressdemo
  namespace: cert-manager
type: kubernetes.io/tls
and then :
kubectl create -f tls.yaml
now if we check our secrets we will find our certificate :
it’s time to update our app-ingress.yaml
apiVersion: networking.k8s.io/v1
kind: Ingress
metadata:
  name: webapp-ingress
  namespace: ingress
  annotations:
    nginx.ingress.kubernetes.io/ssl-redirect: "true"
    nginx.ingress.kubernetes.io/use-regex: "true"
    nginx.ingress.kubernetes.io/rewrite-target: /$1
spec:
  ingressClassName: nginx
  tls:
  - hosts:
    - himhelloworld.com
    secretName: ingressdemo
  rules:
  - http:
      paths:
      - backend:
          service:
            name: my-backend-service
            port:
              number: 5000
        path: /
        pathType: Prefix
      - backend:
          service:
            name: my-nginx-service-01
            port:
              number: 80
        path: /webapp1(/|$)(.*)
        pathType: Prefix
      - backend:
          service:
            name: my-nginx-service-02
            port:
              number: 80
        path: /webapp2(/|$)(.*)
        pathType: Prefix
      - backend:
          service:
            name: my-nginx-service-03
            port:
              number: 80
        path: /webapp3(/|$)(.*)
        pathType: Prefix
  - host: himhelloworld.com # change the IP address here
    http:
      paths:
      - backend:
          service:
            name: my-backend-service
            port:
              number: 5000
        path: /
        pathType: Prefix
      - backend:
          service:
            name: my-nginx-service-01
            port:
              number: 80
        path: /webapp1
        pathType: Prefix
      - backend:
          service:
            name: my-nginx-service-02
            port:
              number: 80
        path: /webapp2
        pathType: Prefix
      - backend:
          service:
            name: my-nginx-service-03
            port:
              number: 80
        path: /webapp3
        pathType: Prefix
and as you can see, I have incorporated two modifications.
first i added a block to decalre where is our certification :
tls:
- hosts:
  - himhelloworld.com
  secretName: ingressdemo
and the second one is to force redirect to https
nginx.ingress.kubernetes.io/ssl-redirect: "true"
Let’s now put our changes into practice :
kubectl apply -f app-ingress.yml
and the result :
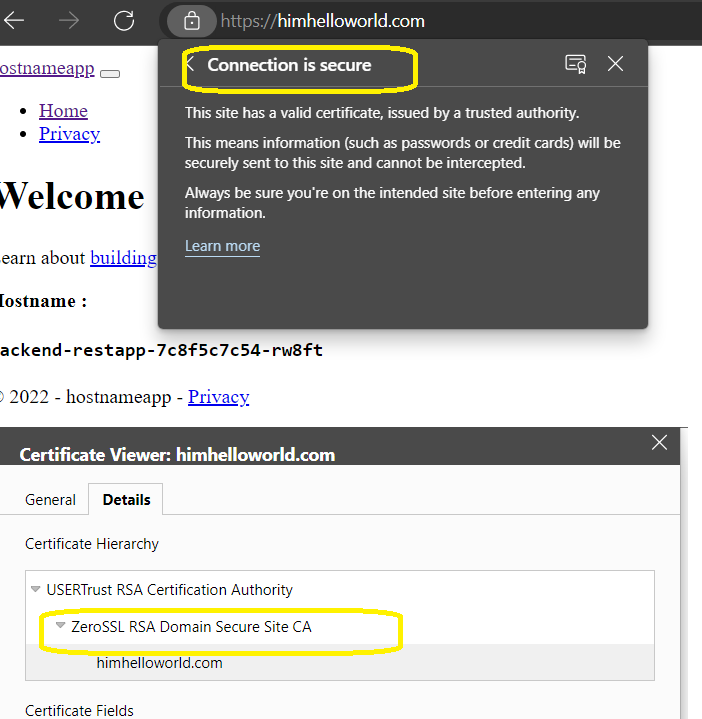
and we will now be switched to https if we attempt to access the website through http.
 This concludes this section of our blog content.
Source code : http://bit.ly/3AM5lTY


Comments 3