Being busy with tasks and calls and you forget to tweet about something you were waiting to share is a huge problem .
Today we are going to see how to schedule and post Tweets using Azure logic apps and it’s quite simple .
First of all we are going to create a simple excel file that contain what are we going to post (tweet is time for the post and Post is for the post it self):
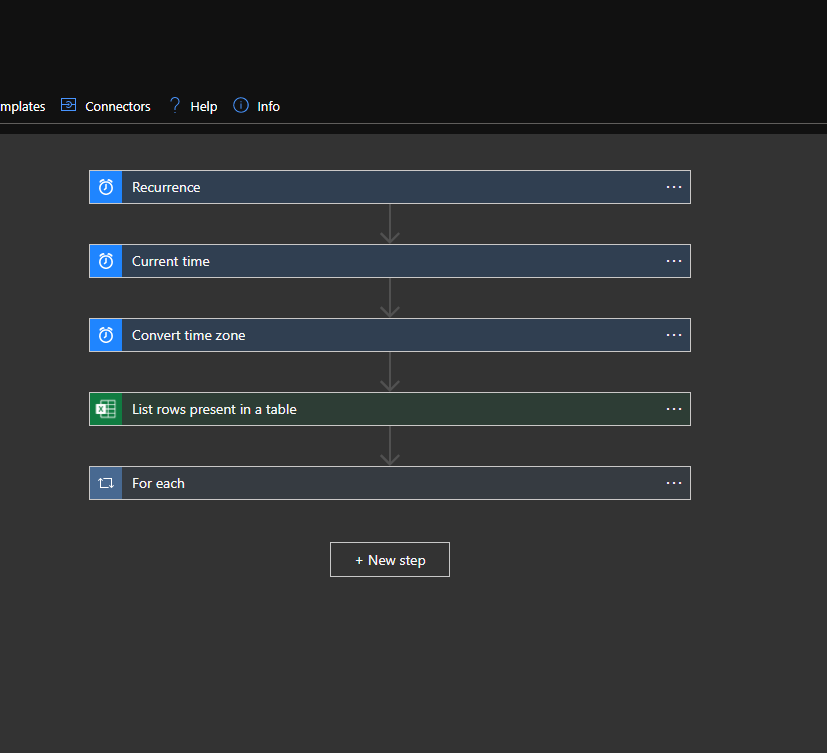
 Now that was simple ,its time to create our logic app composed of 5 steps :
In order to create posts we need a job that check every hour our excel file and see if the hour for post(time now) is the same as we have set in excel file .
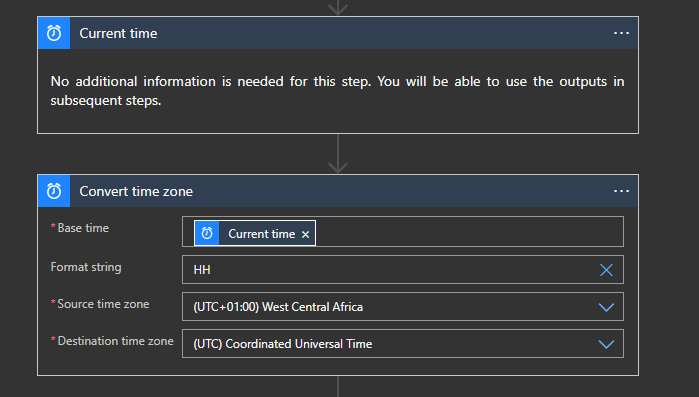
 Step 2 : Get Current Time and Convert it to a specific Time Zone
Posts are related to a certain time , for that our next step is to convert the current time zone that we have to a destination time zone and we took only the hours since we only need hours to compare them to the excel file HH
 Step 3 : List rows present in a table
In this step we are going to connect to our OneDrive and locate the file and the tab that contain our excel file and data
 Step 4-5 : Check the Tweet times with the converted time and post a tweet
Here we set a condition based on the values that we have , if the tweet time is equal to the converted time ,then we create a Tweeter post else we do nothing .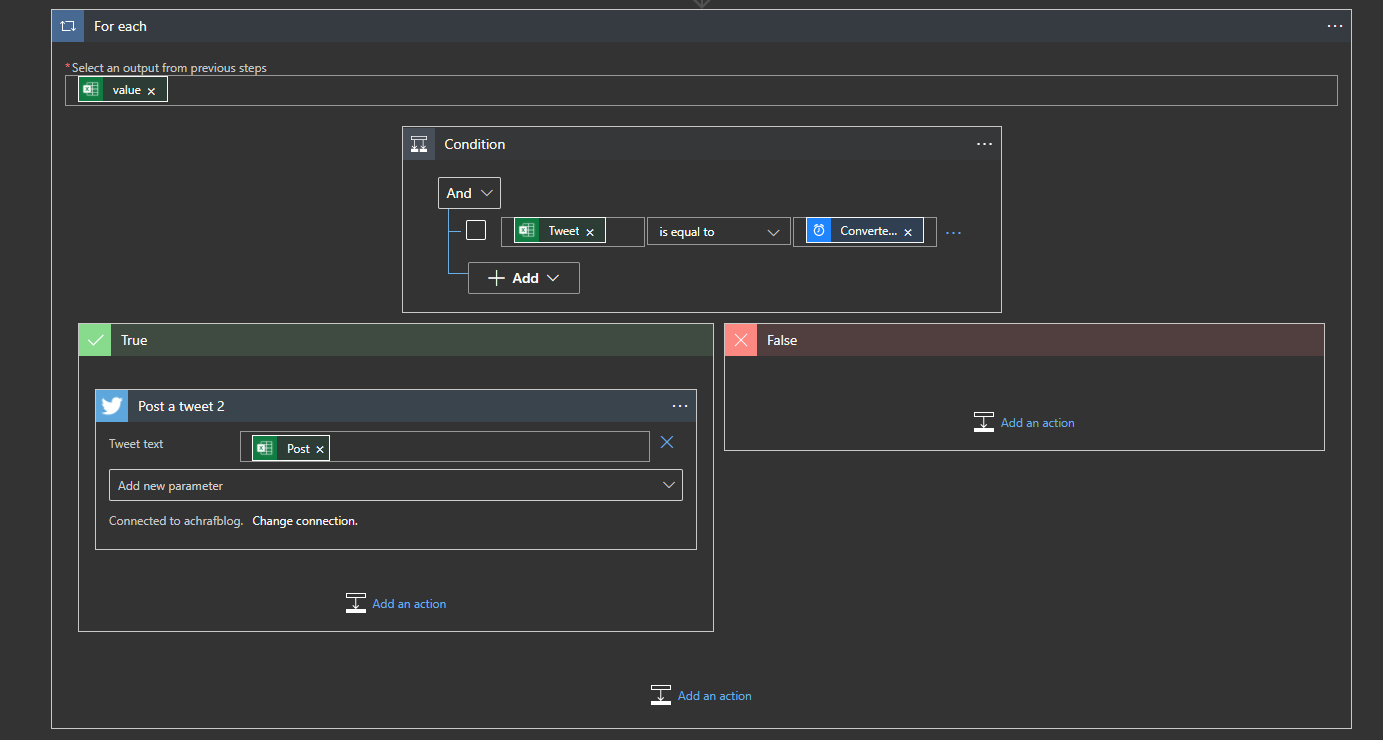
Bonus
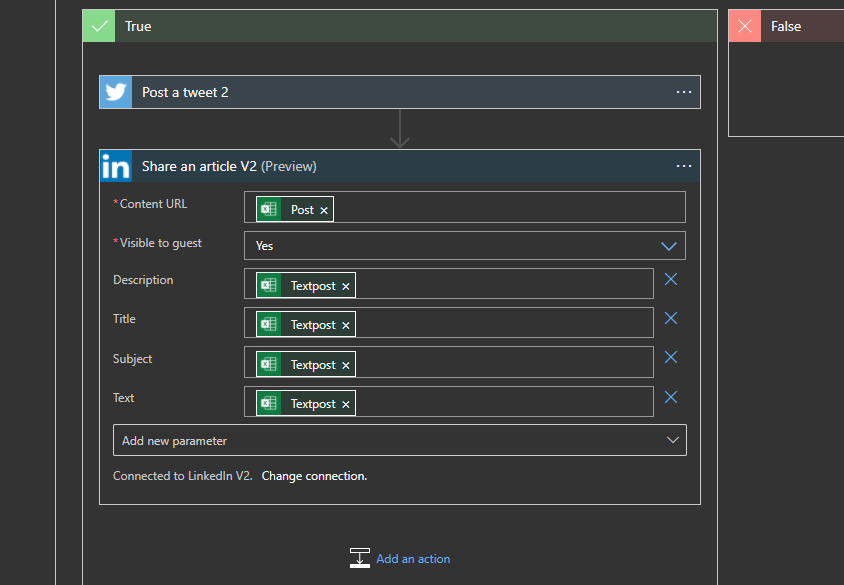
After I finished writing this blog I said why not I add the same post to linkedin since I’m going to post it there , so I added another step that will work only after the success of the tweet post ,we are going to add an action named ‘Share an article V2’ :
If you want to read about the pricing for the logic apps you can read full details from this link : https://bit.ly/32ejk2Y
Hope you enjoyed this blog post ^^
