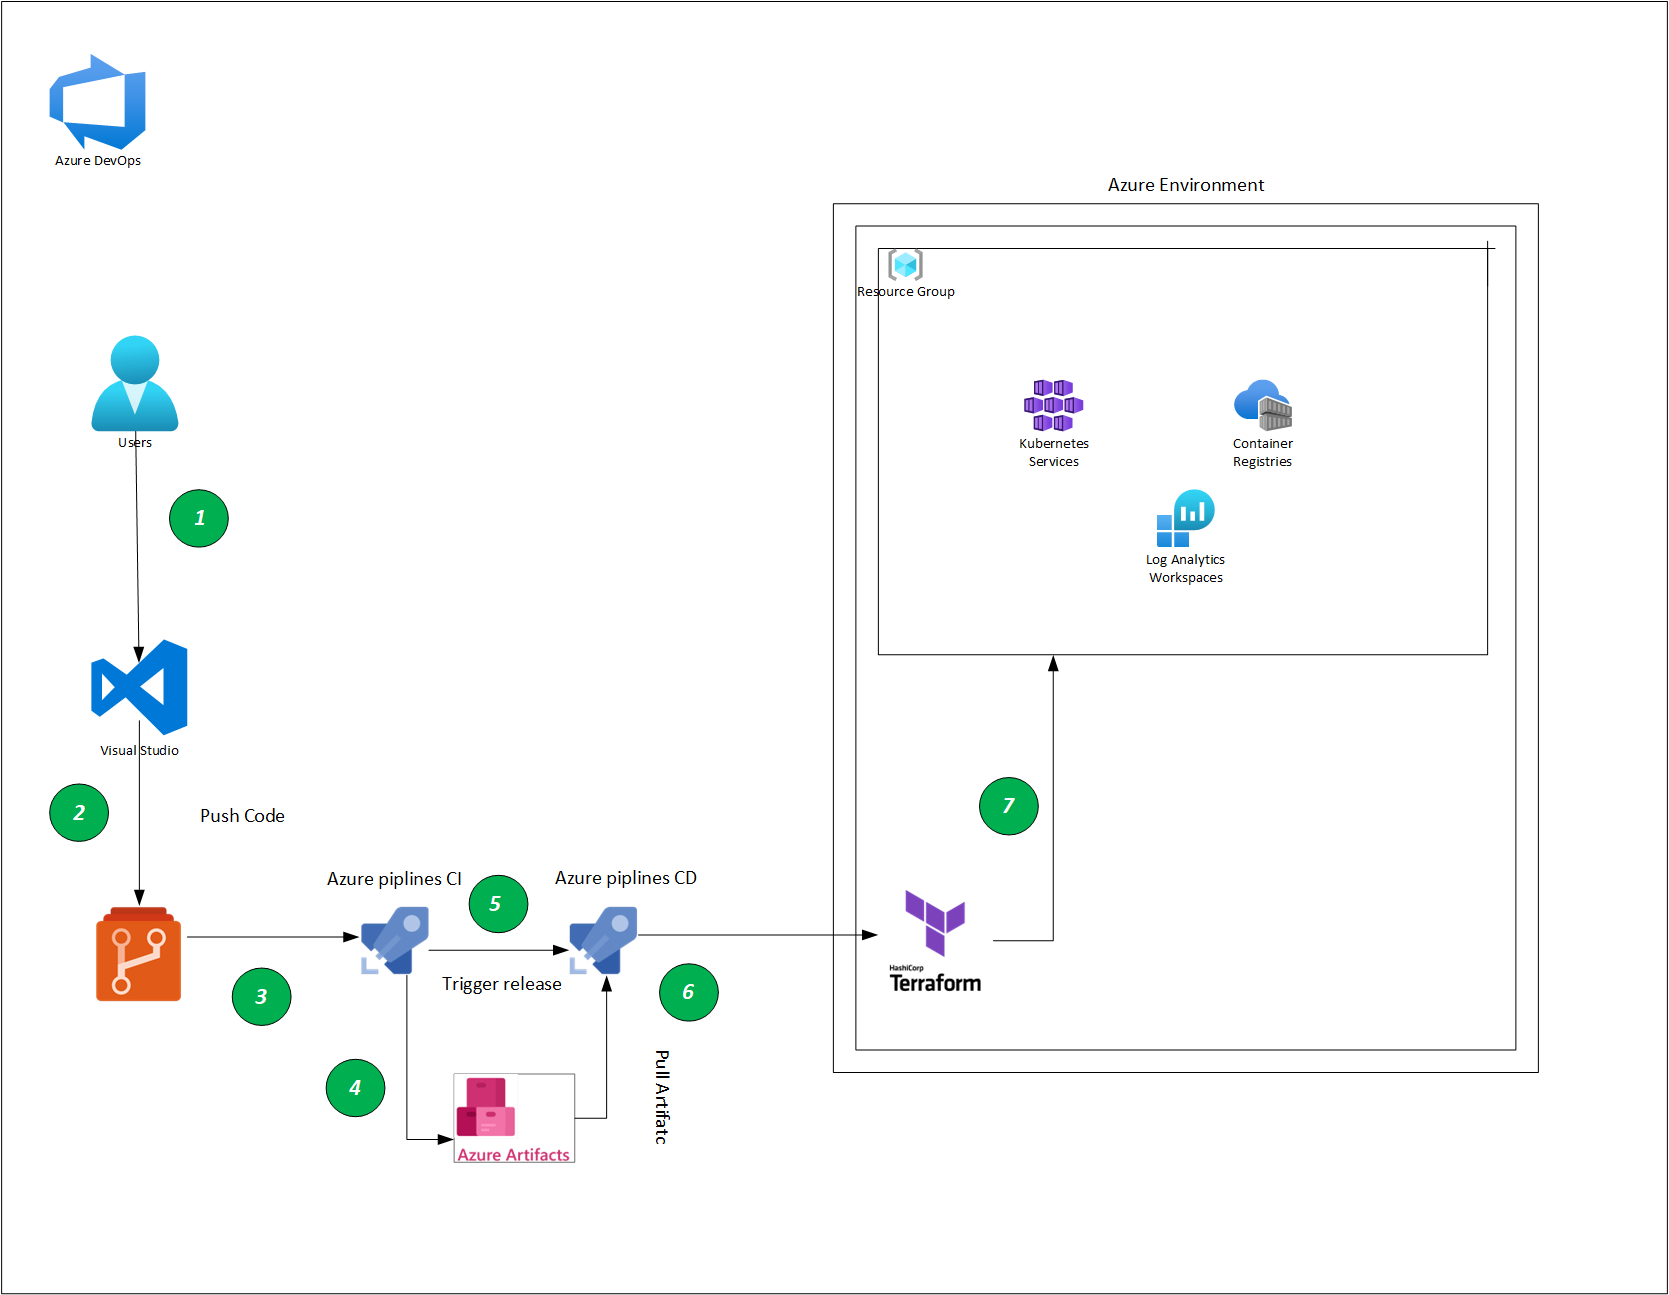
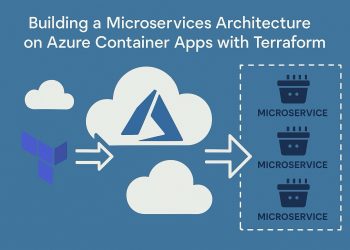
As we continue writing this serie , we come to the part were we are going to deploy our Azure Kubernetes Service (AKS) using terraform and we will be using Azure Devops in order to deploy into Microsoft Azure .
This article is a part of a series:
- Part 1 : How to setup nginx reverse proxy for aspnet core apps with and without Docker compose
- Part 2 :How to setup nginx reverse proxy && load balancer for aspnet core apps with Docker and azure kubernetes service
- Part 3 : How to configure an ingress controller using TLS/SSL for the Azure Kubernetes Service (AKS)
- Part 4 : switch to Azure Container Registry from Docker Hub
- Part 5-A: Using Azure DevOps, Automate Your CI/CD Pipeline and Your Deployments
- Part 6 : Using Github, Automate Your CI/CD Pipeline and Your Deployments
- Part 7 : Possible methods to reduce your costs
1-Creating our CI Pipeline
in this first part we will define our CI pipeline ,the main role of this pipline is to build our terraform by validating and creating a tfplan in order to see what are we going to build .
By validating our pipeline ,we runs checks that verify whether a configuration is syntactically valid and internally consistent, regardless of any provided variables or existing state , after it we use the terraform plan command ,that will creates an execution plan, which lets us preview the changes that Terraform plans to make to our infrastructure .
In advanced scenarios that we may see in future articles , we will add a couple of tools like checkov in order to scan our infrastructure configurations to find misconfigurations before they’re deployed , also tfsec which is a static analysis security scanner for our Terraform code .Defining our Pipline :
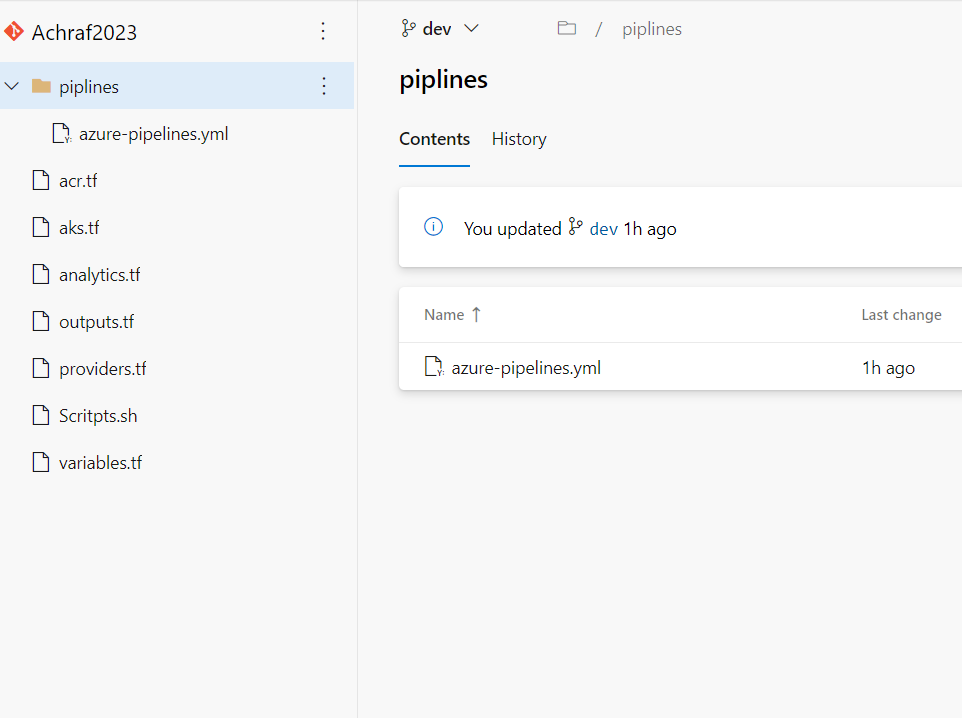
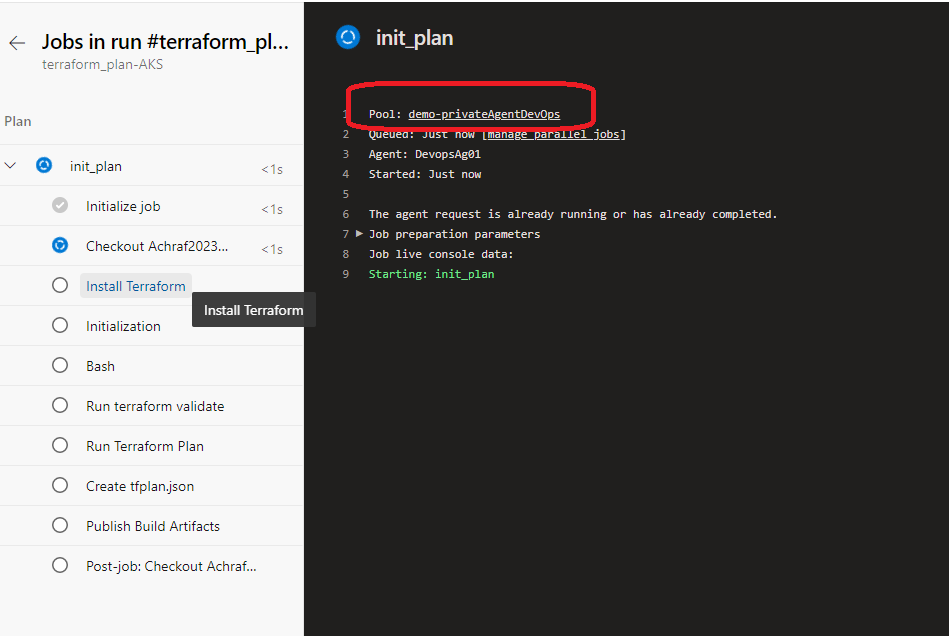
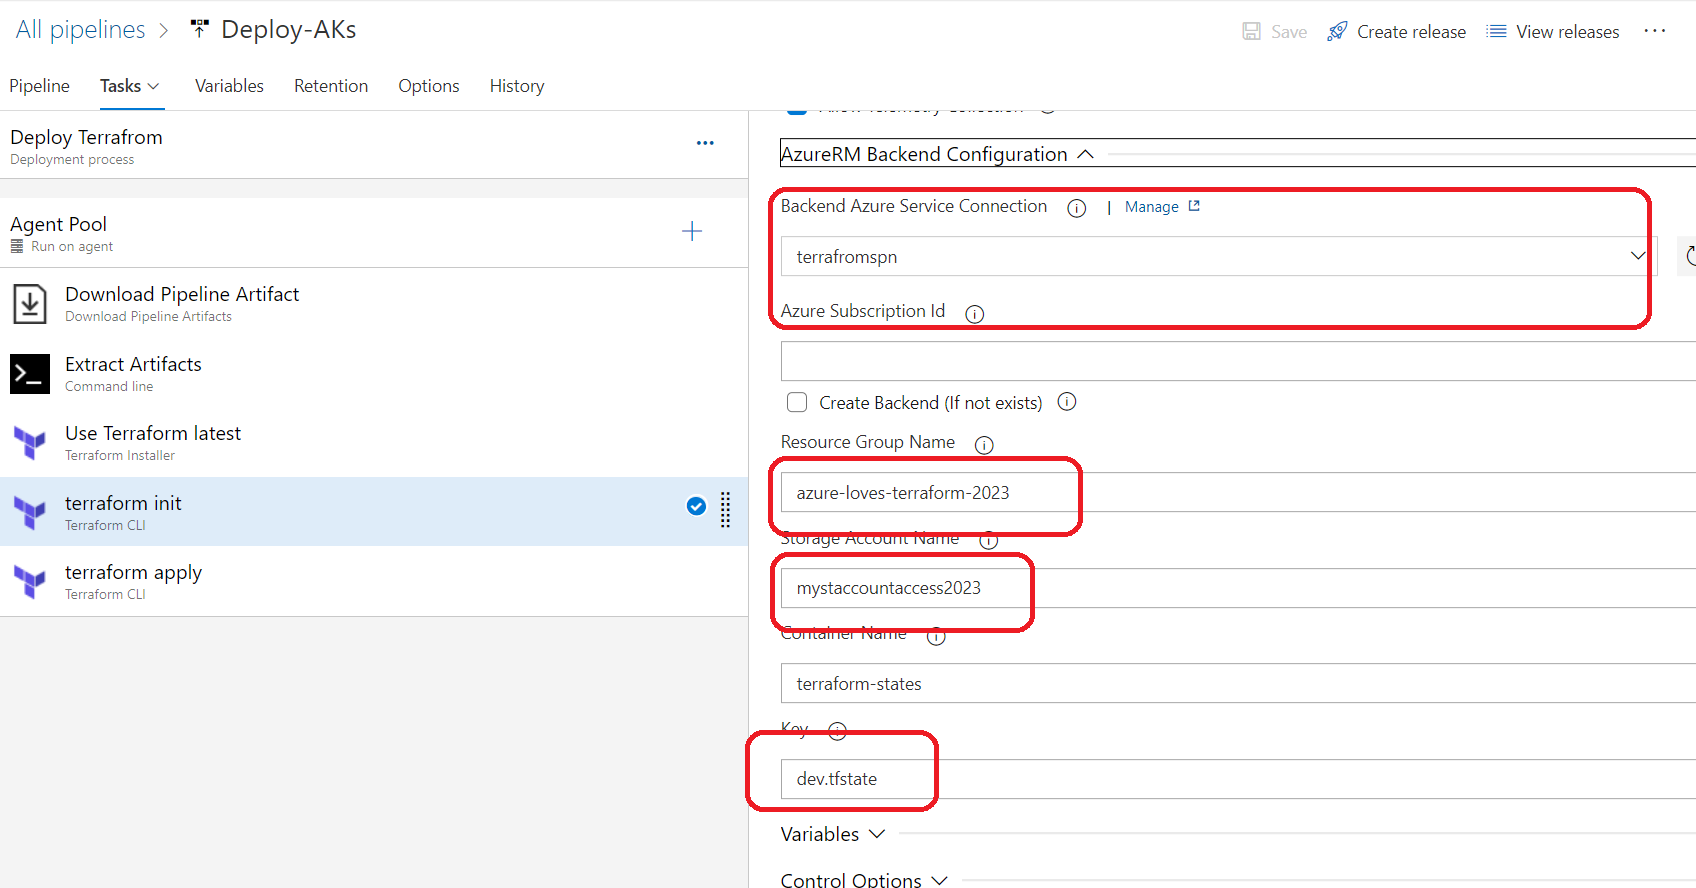
name: $(BuildDefinitionName)_$(date:yyyyMMdd)$(rev:.r)

trigger:
  branches:
    include:
    - dev
#defining our agent pool and the private agent that we created .
pool:
    name: demo-privateAgentDevOps
    demands:
    - Agent.Name -equals DevopsAg01

stages :

  - stage: terraform_plan
    displayName: Plan

    jobs:
      - job: init_plan
        steps:
          - checkout: self

          - task: charleszipp.azure-pipelines-tasks-terraform.azure-pipelines-tasks-terraform-installer.TerraformInstaller@0
            displayName: 'Install Terraform'
            inputs:
              terraformVersion: 'latest'

          - task: TerraformCLI@0
            displayName: 'Initialization'
            inputs:
              command: 'init'
              workingDirectory: '$(System.DefaultWorkingDirectory)/'
              backendType: 'azurerm'
              backendServiceArm: 'terrafromspn'
              backendAzureRmResourceGroupName: 'azure-loves-terraform-2023'
              backendAzureRmResourceGroupLocation: 'francecentral'
              backendAzureRmStorageAccountName: 'mystaccountaccess2023'
              backendAzureRmContainerName: 'terraform-states'
              backendAzureRmKey: dev.tfstate
              allowTelemetryCollection: true

           # Validate our configuration
          - task: TerraformCLI@0
            displayName: 'Run terraform validate'
            inputs:
                 command: 'validate'
                 workingDirectory: '$(System.DefaultWorkingDirectory)'
                 commandOptions:
                 allowTelemetryCollection: true
                 environmentServiceName: 'terrafromspn'
                 backendType: azurerm

          # creates an execution plan
          - task: TerraformCLI@0
            displayName: 'Run Terraform Plan'
            inputs:
                  backendType: azurerm
                  command: 'plan'
                  commandOptions: '-input=false  -out .tfplan'
                  workingDirectory: '$(System.DefaultWorkingDirectory)/'
                  environmentServiceName: 'terrafromspn'
                  publishPlanResults: 'dev-plan'

          - script: |
                cd $(Build.SourcesDirectory)/
                terraform show -json .tfplan >> tfplan.json
                # Format tfplan.json file
                terraform show -json .tfplan | jq '.' > tfplan.json
                # show only the changes
                cat tfplan.json | jq '[.resource_changes[] | {type: .type, name: .change.after.name, actions: .change.actions[]}]'
            displayName: Create tfplan.json

          - task: PublishBuildArtifacts@1
            displayName: 'Publish Build Artifacts'
            inputs:
                PathtoPublish: './'
                ArtifactName: 'dev-tfplan'
                publishLocation: 'Container'
                StoreAsTar: true
As you can see in our pipeline there is a lot of info that are displayed and exposed , this is only for the demo purpose , but in reality we need to put all this info inside a Library and read from there .aks.tfresource "azurerm_kubernetes_cluster" "cluster01" { name = var.cluster_name #kubernetes_version = data.azurerm_kubernetes_service_versions.current.latest_version location = var.resource_group_location resource_group_name = var.rg_name dns_prefix = var.dns_prefix azure_policy_enabled = true oms_agent { log_analytics_workspace_id = azurerm_log_analytics_workspace.insights.id } tags = { Environment = var.env_name } default_node_pool { name = var.agentpool_name node_count = var.agent_count vm_size = var.vm_size } identity { type = var.identity } }acr.tfresource "azurerm_container_registry" "acr_01" { name = var.container_registry_name resource_group_name = var.rg_name location = var.resource_group_location sku = var.container_registry_sku } resource "azurerm_role_assignment" "roleforaks" { principal_id = azurerm_kubernetes_cluster.cluster01.kubelet_identity[0].object_id role_definition_name = var.aks_role_assignment scope = azurerm_container_registry.acr_01.id skip_service_principal_aad_check = true }analytics.tf# resource "random_id" "log_analytics_workspace_name_suffix" { # byte_length = 8 # } resource "azurerm_log_analytics_workspace" "insights" { location = var.resource_group_location # The WorkSpace name has to be unique across the whole of azure; # not just the current subscription/tenant. name = var.log_analytics_workspace_name resource_group_name = var.rg_name sku = var.log_analytics_workspace_sku } resource "azurerm_log_analytics_solution" "insights" { location = var.resource_group_location resource_group_name = var.rg_name solution_name = "ContainerInsights" workspace_name = azurerm_log_analytics_workspace.insights.name workspace_resource_id = azurerm_log_analytics_workspace.insights.id plan { product = "OMSGallery/ContainerInsights" publisher = "Microsoft" } }providers.tfterraform { required_providers { azurerm = { source = "hashicorp/azurerm" version = ">=3.0.0" } } backend "azurerm" { use_msi = true } } provider "azurerm" { features {} skip_provider_registration = true }variables.tfvariable "cluster_name" { description = "The name for the AKS cluster" default = "achrafdoingaks" } variable "env_name" { description = "The environment for the AKS cluster" default = "dev" } variable "resource_group_name_prefix" { default = "rg" description = "Prefix of the resource group name that's combined with a random ID so name is unique in your Azure subscription." } variable "resource_group_location" { default = "francecentral" description = "Location of the resource group." } # Refer to https://azure.microsoft.com/pricing/details/monitor/ for Log Analytics pricing variable "log_analytics_workspace_sku" { default = "PerGB2018" } variable "log_analytics_workspace_name" { default = "log-dvs-aks-dev-fc-01" } # Refer to https://azure.microsoft.com/global-infrastructure/services/?products=monitor for available Log Analytics regions. variable "log_analytics_workspace_location" { default = "francecentral" } variable "dns_prefix" { default = "hostnametest" } variable "rg_name" { default = "azure-loves-terraform-2023" } variable "agentpool_name" { default = "agentpool01" } variable "vm_size" { default = "standard_b2s" } variable "identity" { default = "SystemAssigned" } variable "agent_count" { default = 1 } variable "container_registry_name" { default = "crdvsaksdevfc01" } variable "container_registry_sku" { default = "Standard" } variable "aks_role_assignment" { default = "AcrPull" }now our repository will look like that :

Running our CI Pipeline
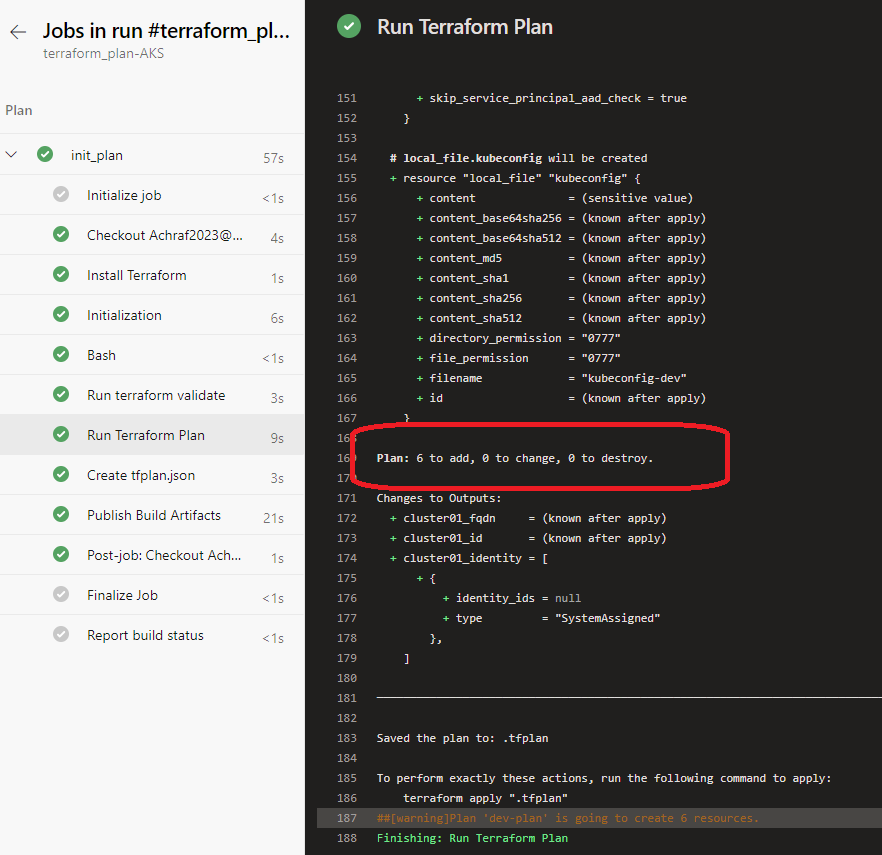
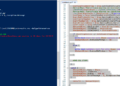
Now that our pipeline finished running without any errors , we can see in Terraform plan task the results ,we are going to create 6 new resources , 0 to change and 0 to destroy which means we are very good .Even if the pipeline is not giving us any errors , I always take a look at what are we doing from creating ,changing or destroying .Now that we have put our CI pipeline in place , it’s time to create our CD Pipeline which will be responsible for deploying our infra .2-Creating our CD Pipeline
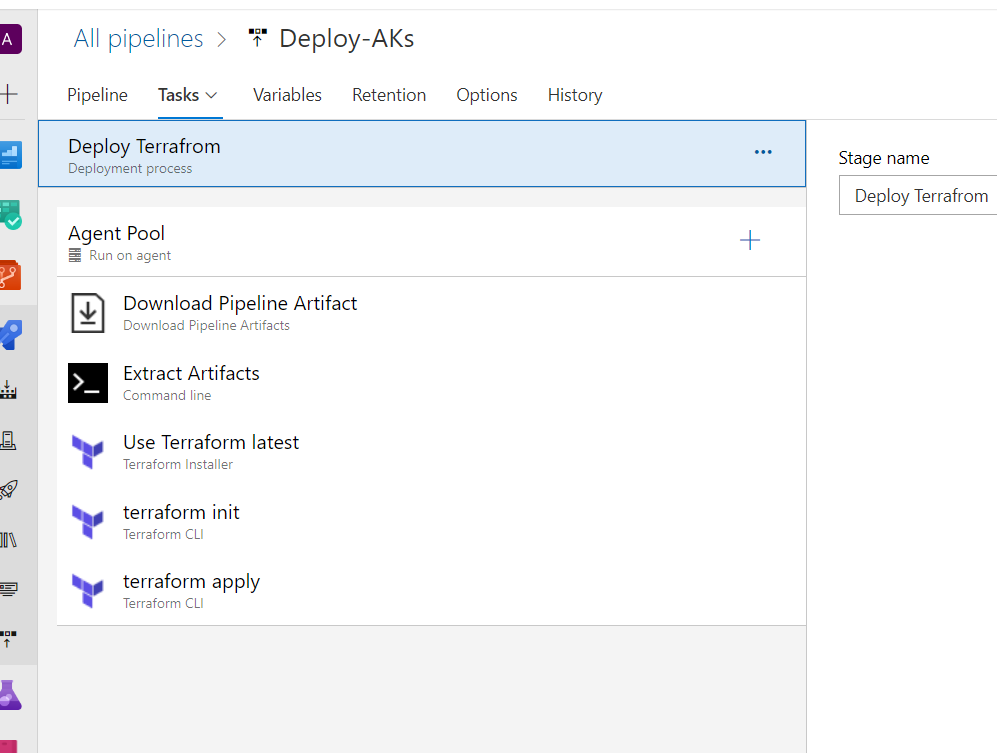
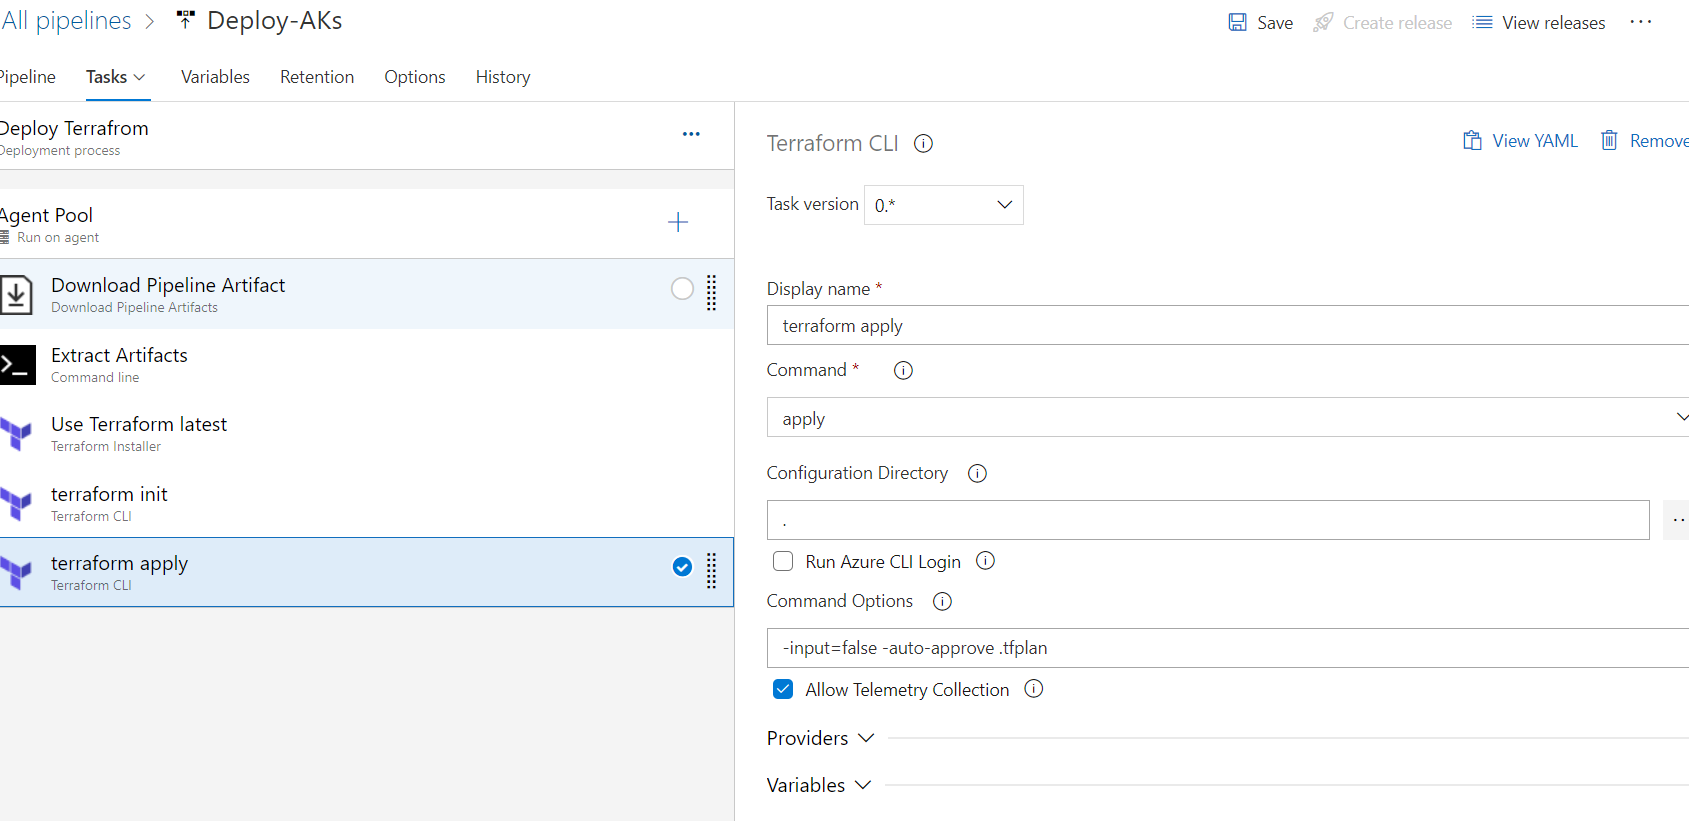
Azure DevOps CD pipeline for Terraform is a continuous delivery (CD) pipeline that automates the deployment of infrastructure managed by Terraform to Microsoft Azure .
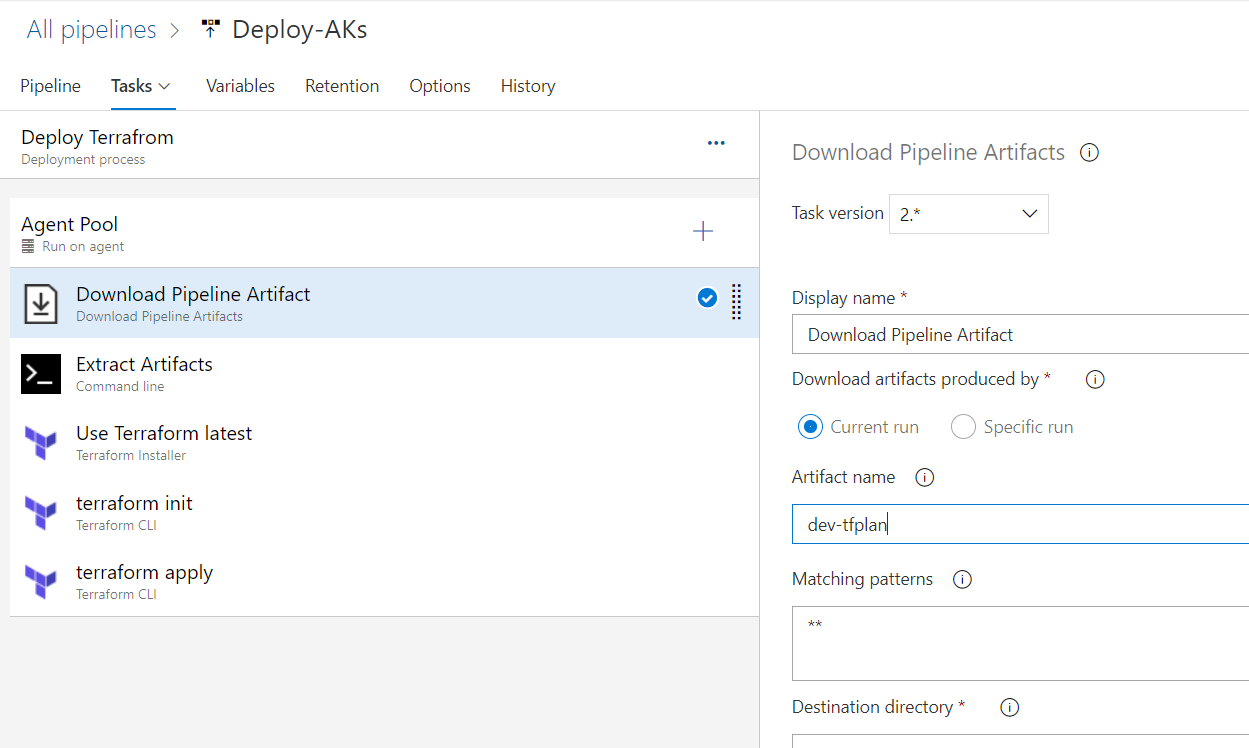
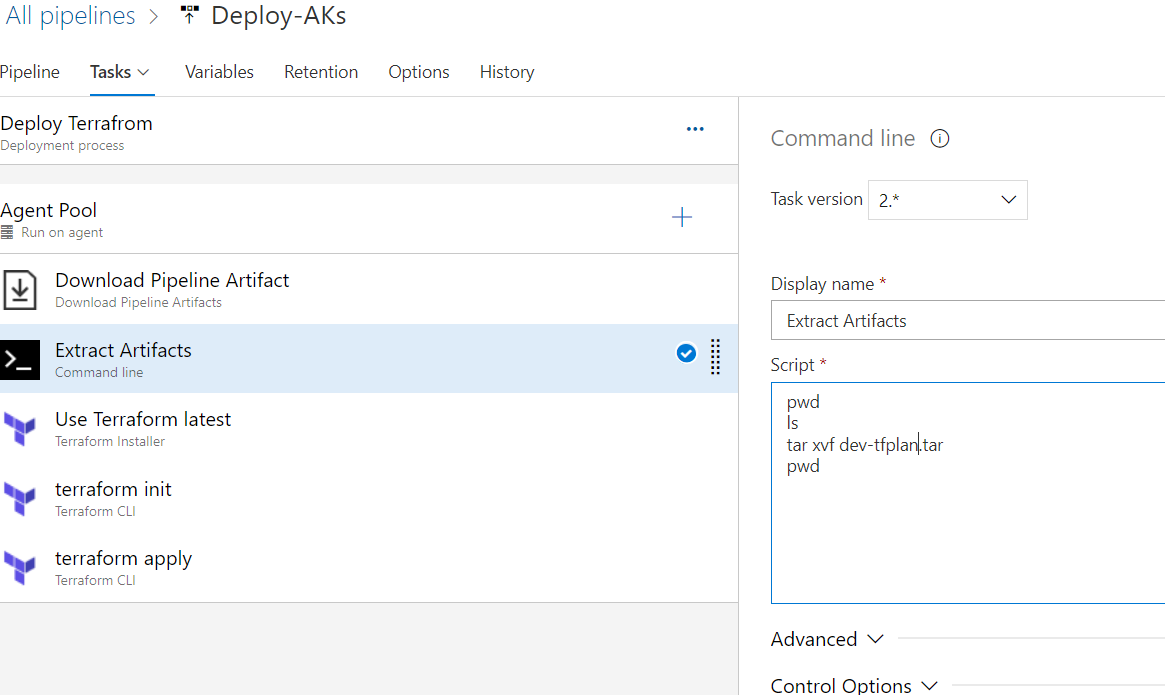
Our CD pipline will download the artifact that we have created , and deploy it to azure .
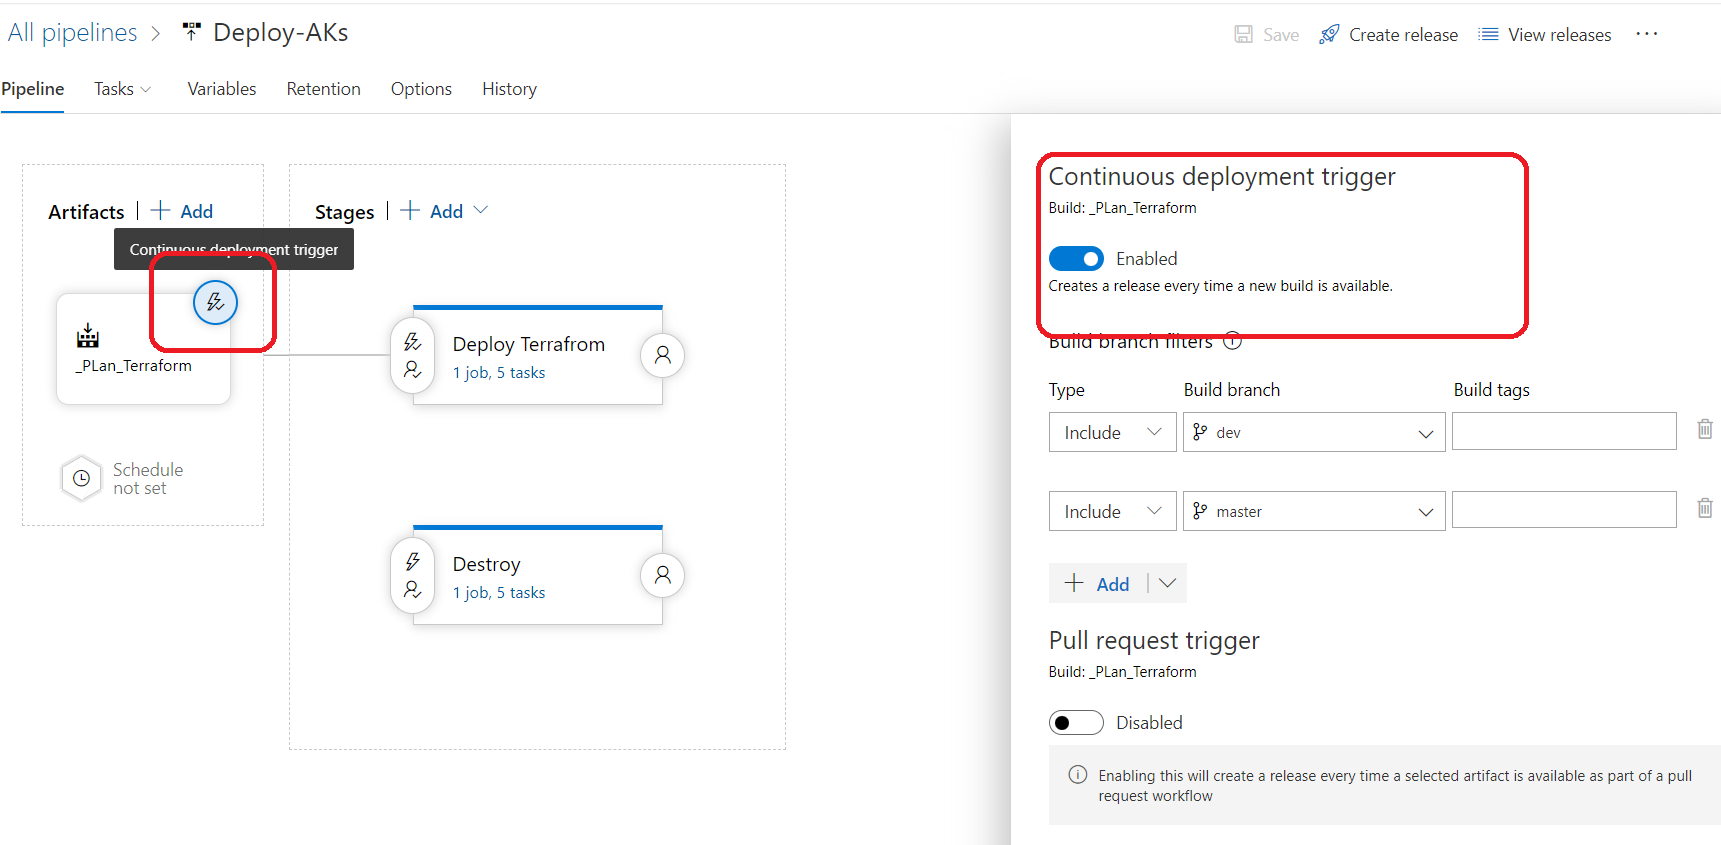
Now , we will just add triggers .
so what is a trigger in azure DevOps?In Azure DevOps, a trigger is a mechanism that automatically starts a build or release pipeline in response to a specific event, such as a code commit, a pull request, a code merge, or a new artifact version. Triggers are essential to achieve continuous integration (CI) and continuous delivery (CD) in modern software development.
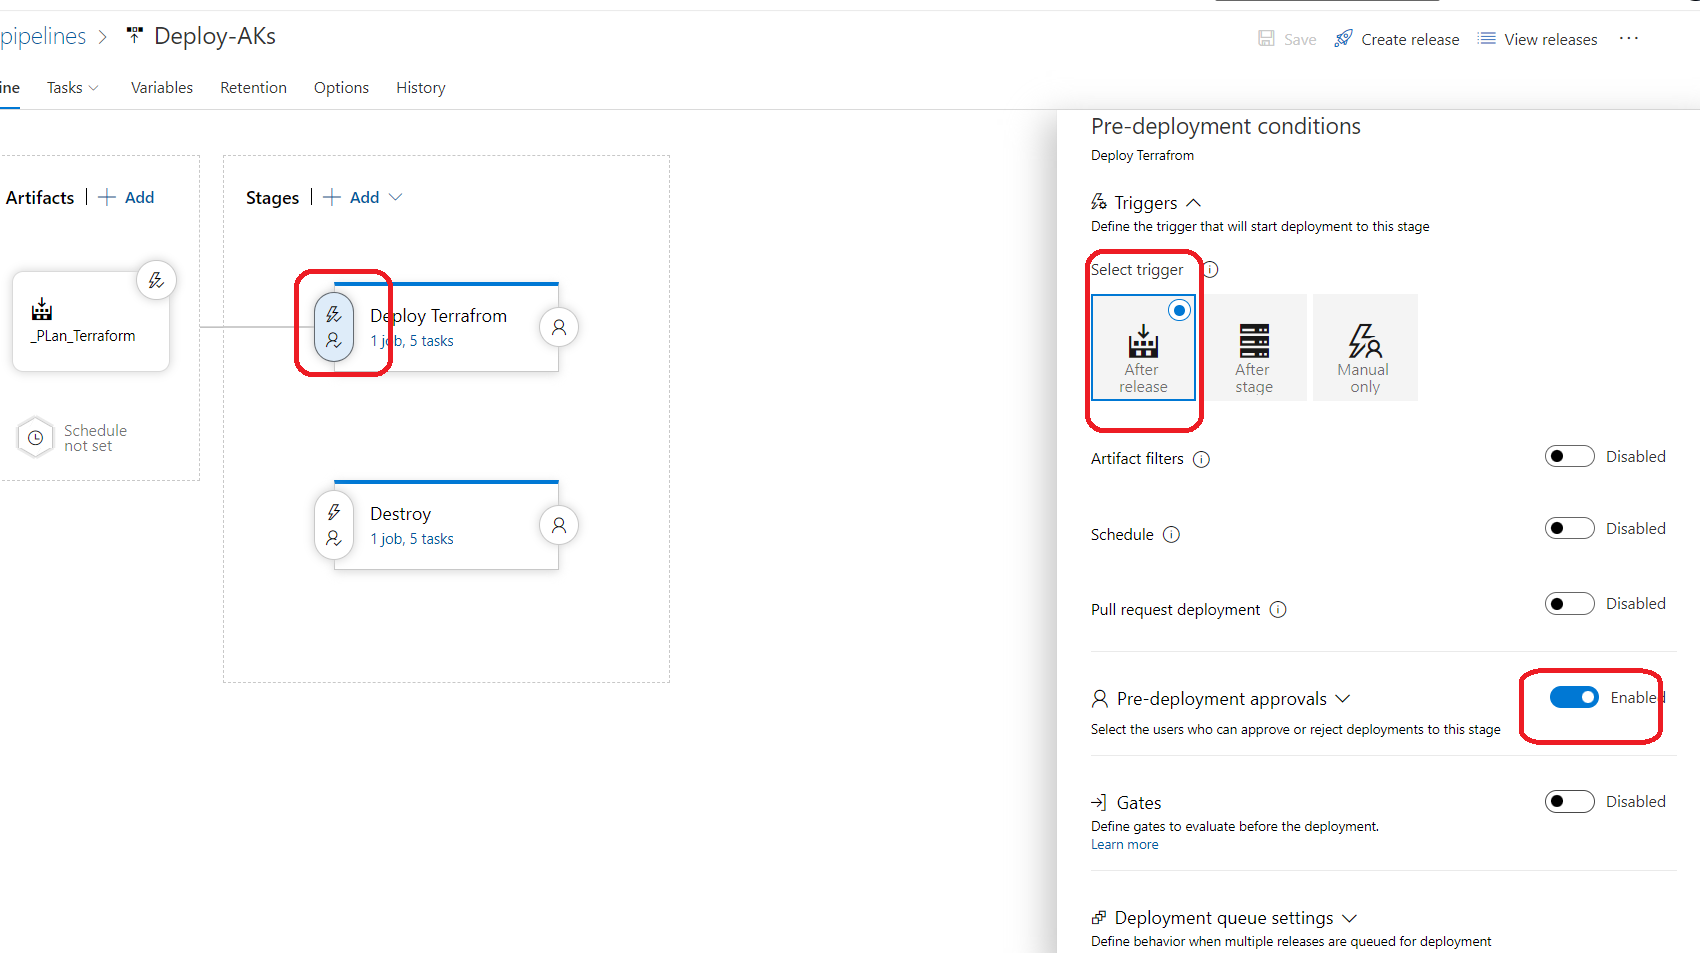
Now , everytime a new build finish and generate an artifact , a new release pipline will be created , but in my case I do not prefer auto deployment , I always choose to add Pre-deployment approvals .Pre-deployment approvals are a way to ensure that the right people have reviewed and approved the changes before they are deployed, which can help you prevent mistakes, reduce risks, and improve the overall quality of your software.
Here are some reasons why you should use pre-deployment approvals in Azure DevOps:
- Compliance: Pre-deployment approvals can help you comply with regulatory requirements, industry standards, or internal policies that mandate a formal approval process for production changes. Pre-deployment approvals provide an audit trail of who approved the changes, when, and why, which can help you demonstrate compliance and reduce the risk of non-compliance.
- Risk management: Pre-deployment approvals can help you mitigate the risks associated with deploying code changes to production or critical environments, such as data loss, service interruption, or security breaches. Pre-deployment approvals enable you to review the changes and assess their impact on the environment, identify potential issues, and take appropriate actions before the changes are deployed.
- Quality assurance: Pre-deployment approvals can help you improve the overall quality of your software by ensuring that the changes are properly tested, reviewed, and validated before they are deployed. Pre-deployment approvals can help you catch defects, errors, or vulnerabilities that may have been missed during development or testing, and ensure that the changes are aligned with the business requirements and user expectations.
- Collaboration: Pre-deployment approvals can help you foster collaboration and communication among the different teams involved in the software delivery process, such as developers, testers, operations, and stakeholders. Pre-deployment approvals provide a centralized place to discuss the changes, share feedback, and resolve conflicts, and can help you build trust, accountability, and transparency across the teams.Overall, pre-deployment approvals in Azure DevOps are a best practice in modern software delivery that can help you ensure the reliability, security, and performance of your applications in production. By using pre-deployment approvals, you can reduce the risk of downtime, data loss, or security breaches, and improve the user experience and business outcomes.Now let’s see what we have :
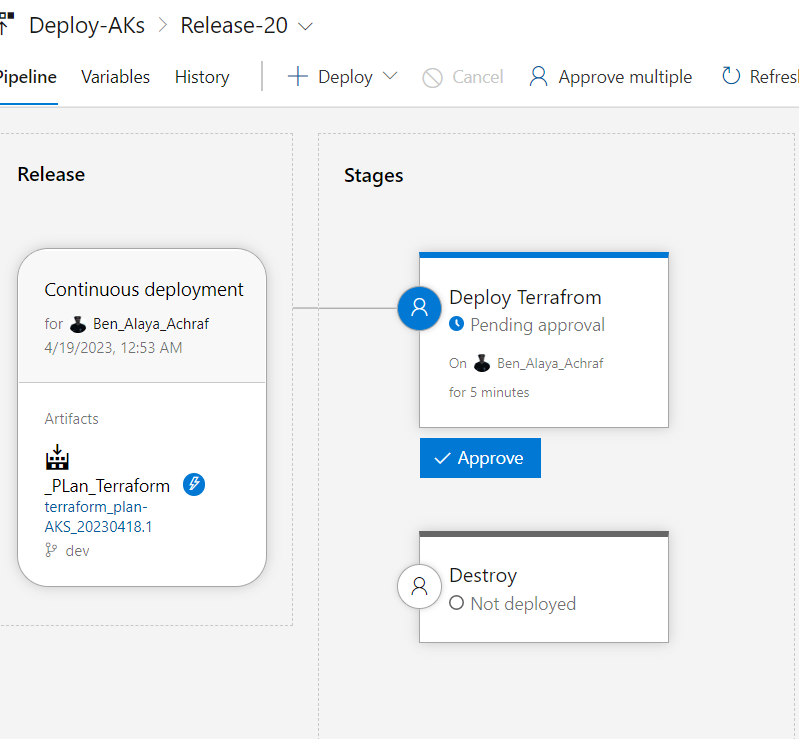
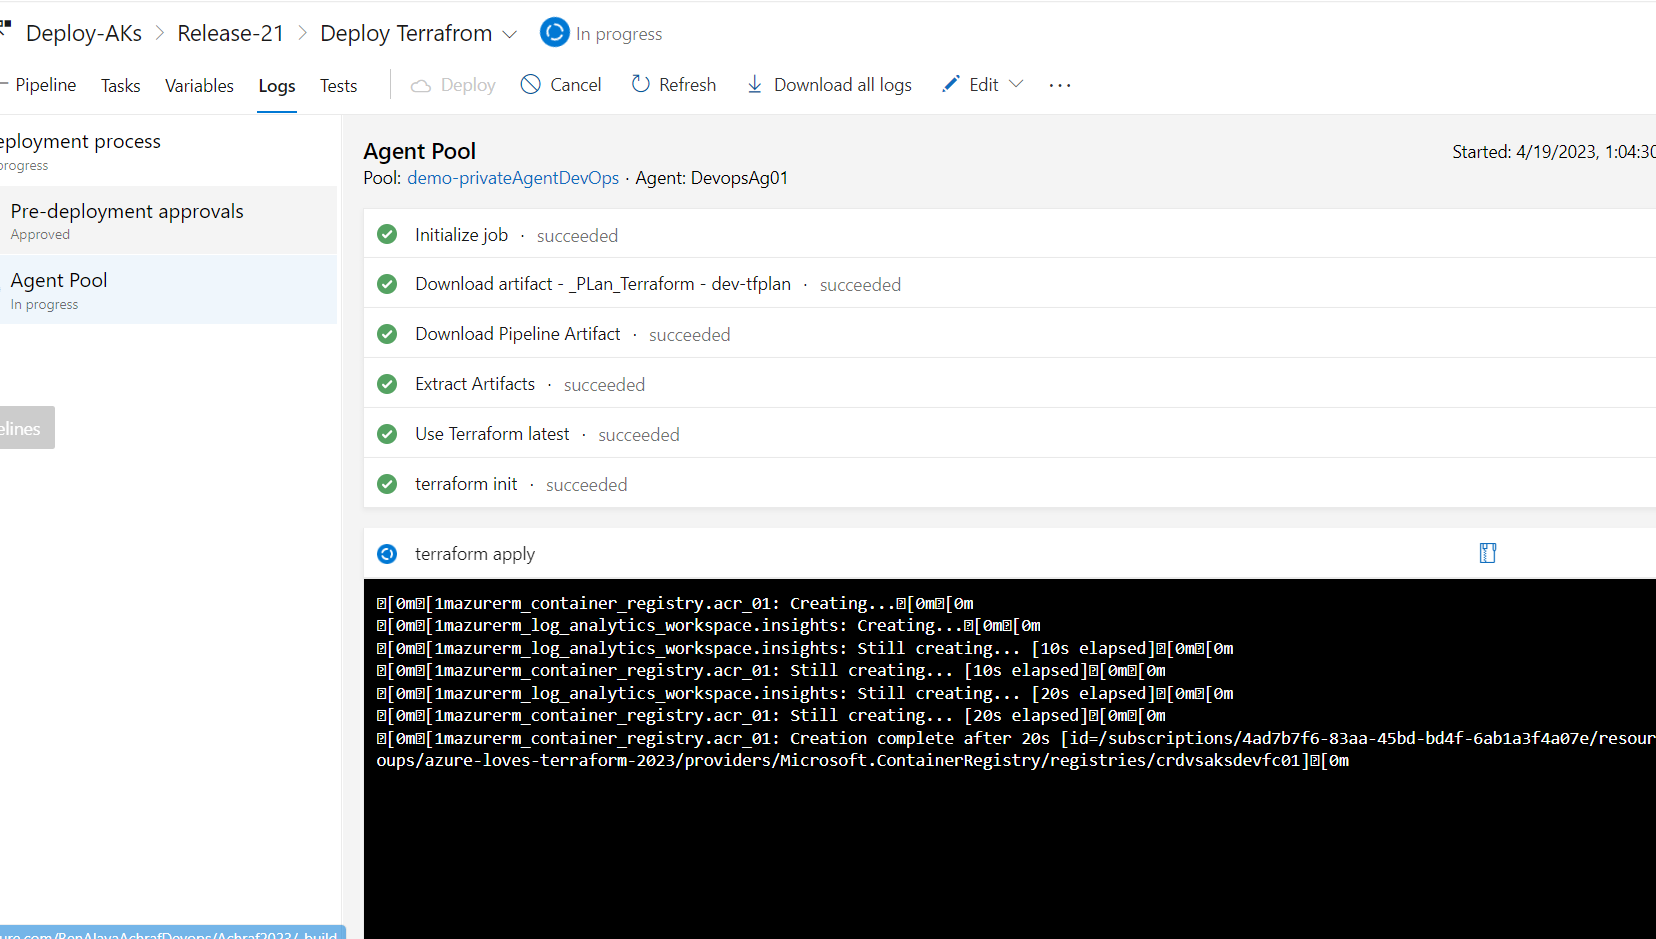
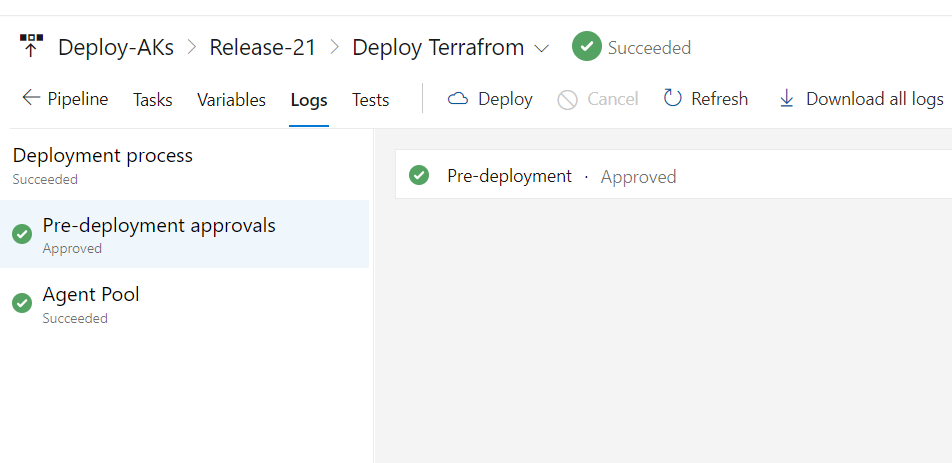
A new release pipline was launched and let’s approve in order to deploy our infra .
As you can see, we have now deployed our resources and are prepared to use Kubernetes.
At the conclusion of this blog article, I realized that I had forgotten to describe how to automatically deploy our application to Kubernetes. This will be covered in a subsequent blog post.


Comments 2