Introduction
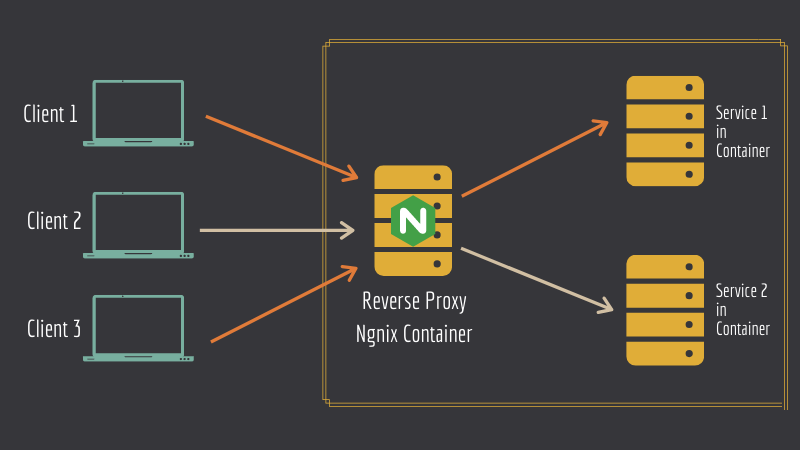
First of all and before we go straight to deployment and demo let’s understand what is a reverse proxy .
A reverse proxy intercepts all incoming requests and direct them to the appropriate server ,it can play the role of Load Balancer ” a Traffic Cop ” that will distribute the clients requests across group of servers in order to maximizes speed and capacity and making sure that no server is overloaded (in case a server is down the load balancer will redirect the traffic to the other servers ) ,more than that a reverse proxy will protect the identity of the other servers and act as a defense againsts security attacks .In this sense the reverse proxy will make sure that multiple servers can be accessed only from a single URL .
Prerequisites
- Visual studio or visual studio code
- A command mine /Terminal
- Docker installed on your system
Part 1- Without Docker Compose
in this first part we will create our dotnet application that we will use now and later too , also nginx .
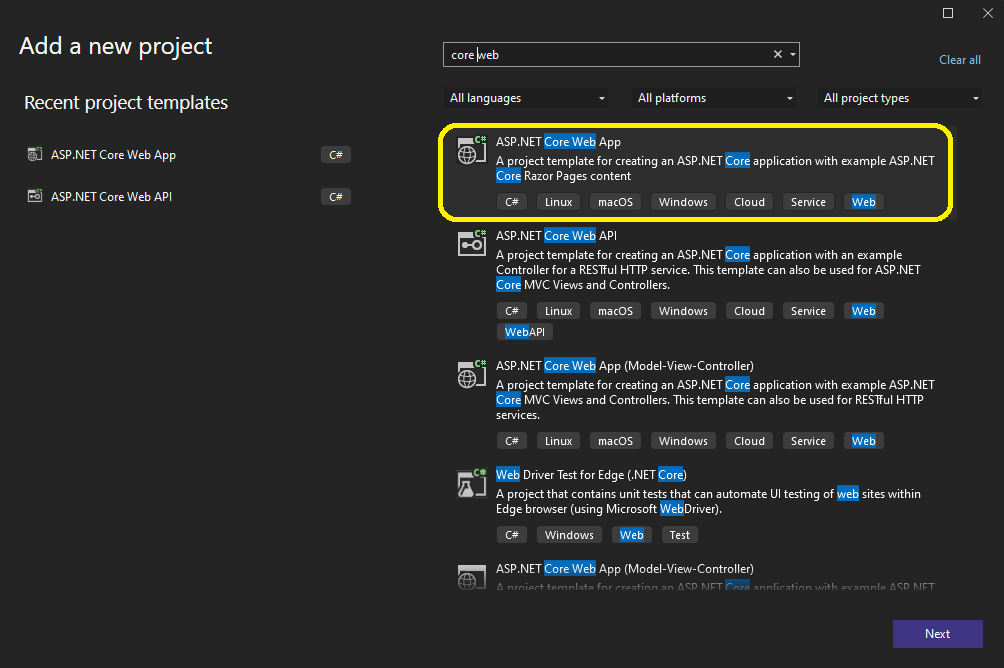 and we will go straight to our Index.cshtml , and edit it to be like this :
@page
@model IndexModel

@{
    ViewData["Title"] = "Home page";
    var hostname = ViewData["host"];
}

<div class="text-center">
    <h1 class="display-4">Welcome</h1>
    <p>Learn about <a href="https://docs.microsoft.com/aspnet/core">building Web apps with ASP.NET Core</a>.</p>
    <p>
        <strong>Hostname :</strong> <h3> <code>@hostname</code></h3>
    </p>
</div>
Also we will edit the Index.cshtml.cs
using Microsoft.AspNetCore.Mvc;
using Microsoft.AspNetCore.Mvc.RazorPages;
using System.Net;

namespace hostnameapp.Pages
{
    public class IndexModel : PageModel
    {
        private readonly ILogger<IndexModel> _logger;
        [BindProperty]
        public string? hostname { get; set; }
        public IndexModel(ILogger<IndexModel> logger)
        {
            _logger = logger;
        }

        public void OnGet()
        {
            String hostName = Dns.GetHostName();
            Console.WriteLine(hostName);
            ViewData["host"] = hostName;


        }
    }
}
now if we run the application using IIS express we will have this view :
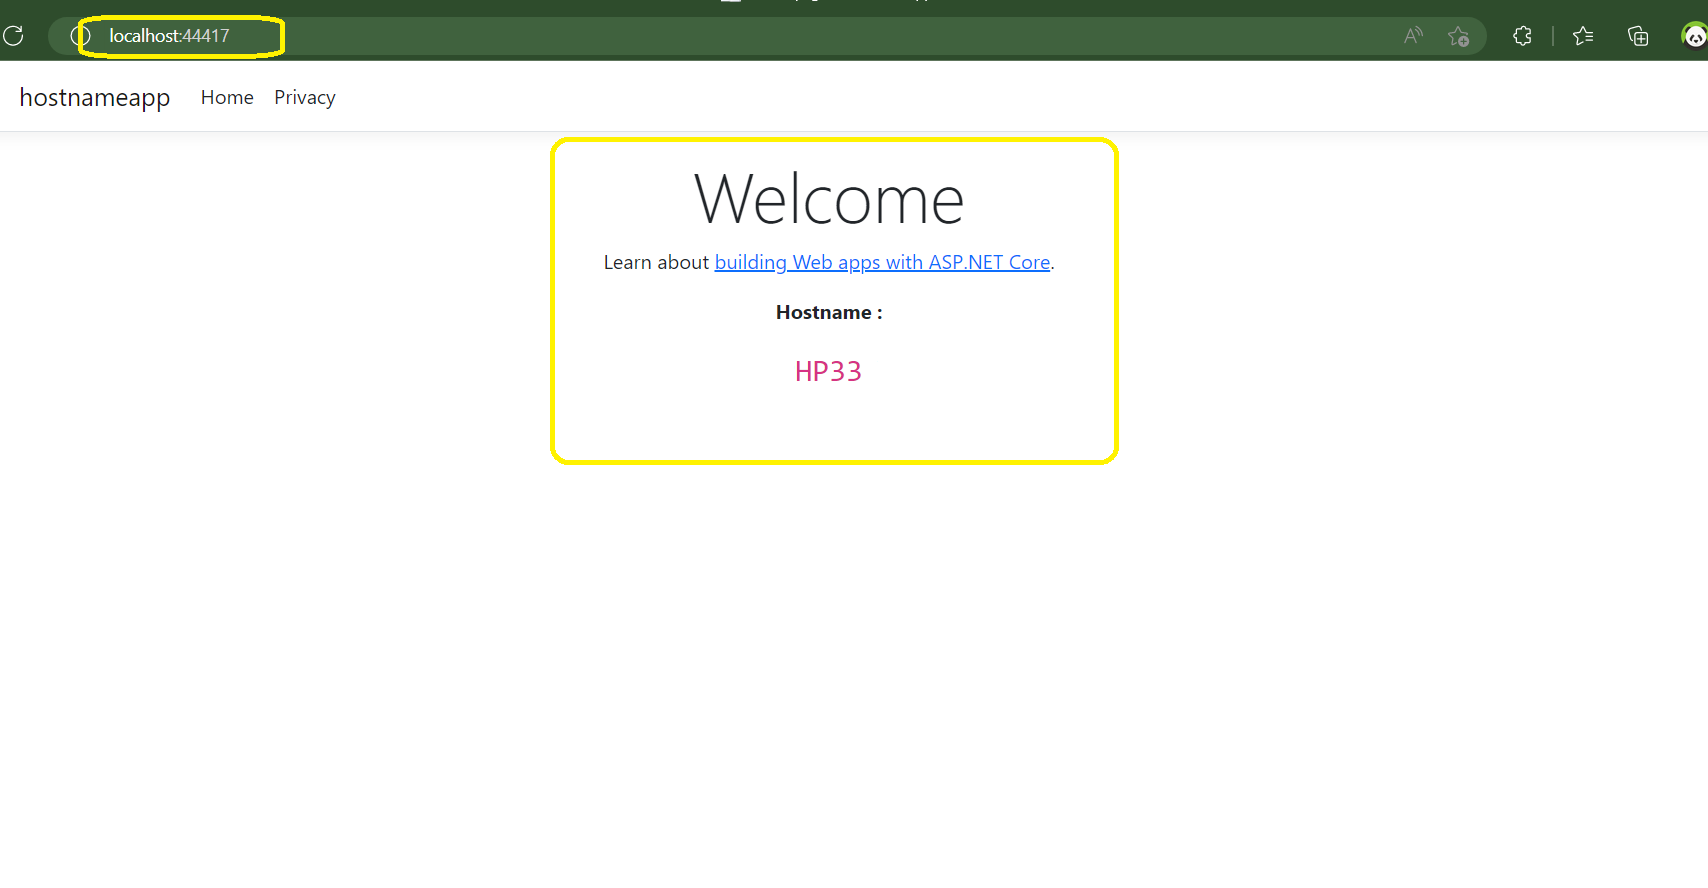 As you can see the goal here is to show the hostname , nothing special .
now we will dockeriz application by creating a dockerfile with this content (full source code of the solution will be shared )
FROM mcr.microsoft.com/dotnet/aspnet:6.0-alpine AS base

WORKDIR /app
ENV ASPNETCORE_URLS http://+:5000
# EXPOSE 80
EXPOSE 5000

FROM mcr.microsoft.com/dotnet/sdk:6.0-alpine AS build
WORKDIR /src
COPY ["hostnameapp/hostnameapp.csproj", "hostnameapp/"]
RUN dotnet restore "hostnameapp/hostnameapp.csproj"
COPY . .
WORKDIR "/src/hostnameapp"
RUN dotnet build "hostnameapp.csproj" -c Release -o /app/build

FROM build AS publish
RUN dotnet publish "hostnameapp.csproj" -c Release -o /app/publish /p:UseAppHost=false

FROM base AS final
WORKDIR /app
COPY --from=publish /app/publish .
ENTRYPOINT ["dotnet", "hostnameapp.dll"]
now we will create the nginx application but we have some config for the app :
we will create a file : nginx.conf
worker_processes 4;

events { worker_connections 1024; }

http {
    sendfile on;
    limit_req_zone $binary_remote_addr zone=one:10m rate=5r/s;
    # upstream app_servers {
    #     #server app:127.0.0.1:5000;
    #   # server  http://backend:5000;
    # }

    server {
        listen 80;

        location / {
            proxy_pass          http://backend:5000;
            proxy_redirect     off;
            proxy_set_header   Host $host;
            proxy_set_header   X-Real-IP $remote_addr;
            proxy_set_header   X-Forwarded-For $proxy_add_x_forwarded_for;
            proxy_set_header   X-Forwarded-Host $server_name;
        }
    }
}
Also we are going to docke the nginx proxy app
FROM nginx:alpine
RUN rm -r  /etc/nginx/nginx.conf
COPY nginx.conf /etc/nginx/nginx.conf
now we can build both apps and run them to see what will happen .
let’s start with our dotnet application we need to build and run our solution :
docker build -t backend  .
docker run -it --rm -p 5000:5000   --name backend backend
Now if you go to your browser and visit : http://localhost:5000/ you will have this result :
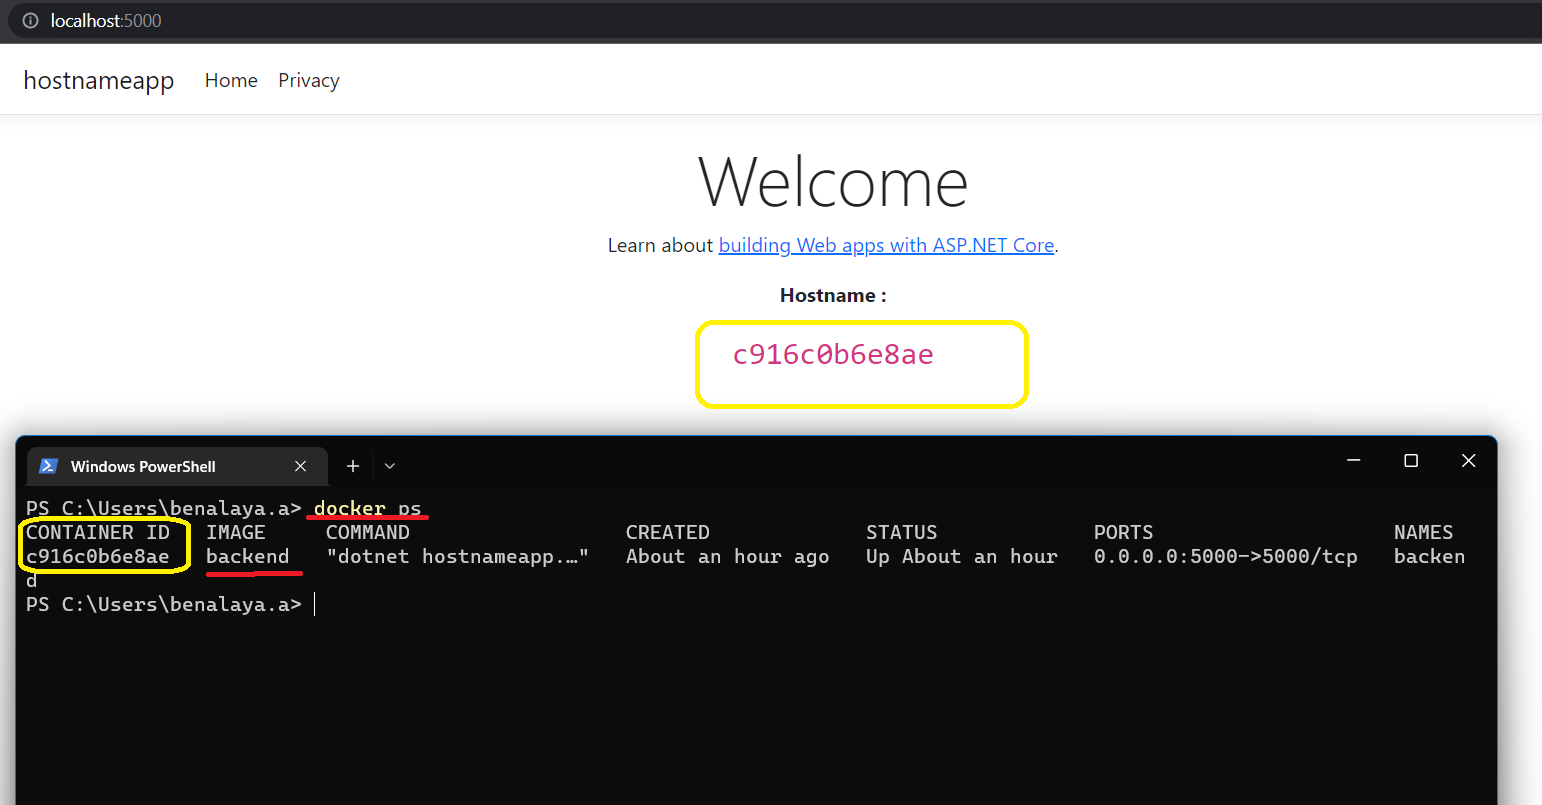
And now as you can see our hostname have the id of the container .
now it’s time to run the nginx proxy that will be the entry to our application or let’s say the way we will expose our application .
docker build -t frontend  .
docker run -it --rm -p 8082:80   --name frontend frontend
if we run those commandes the project will build but will not run and we will finish by having an error saying that host not found , the host is the backend that we defined in the config file with port 5000 , and that’s because the two containers are not in the same network !
now let’s make some changes :
Let’s create a network :
docker network create demonetwork-001;
#to inspect that network
docker network inspect demonetwork-001;
now we need to attach our containers to the network that we have created :
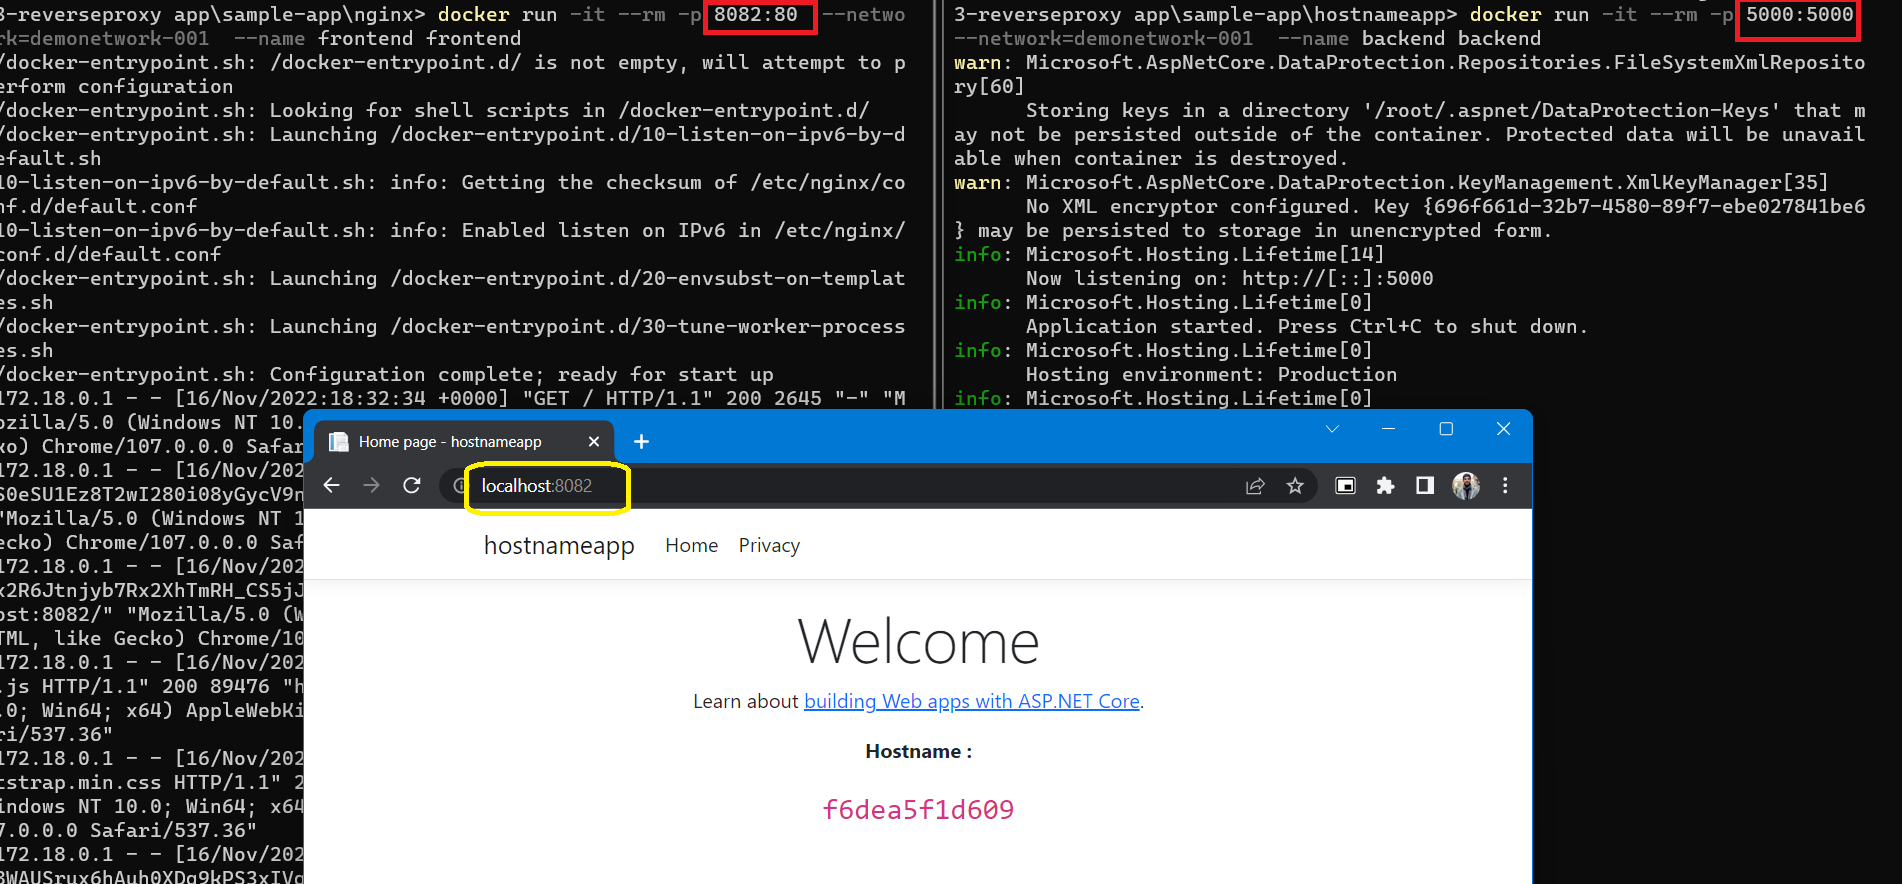
docker network connect demonetwork-001 backend;
#this will fail because the container did exit beceause of error
docker network connect demonetwork-001 frontend;

--------------instead we will use this -------------------------
docker run -it --rm -p 5000:5000 --network=demonetwork-001  --name backend backend
docker run -it --rm -p 8082:80  --network=demonetwork-001  --name frontend frontend
and like that we will have our result while visiting our entry point on port 8082 :
Part 2- With Docker Compose
now all we need is to create a docker compose file without editing our solutions : docker-compose.yml
version: "3.9"
services:
  app:
    build: ./hostnameapp
    expose:
      - "5000"
  proxy:
    #image: nginx:alpine
    build: ./nginx
    volumes:
      - ./nginx.conf:/etc/nginx/nginx.conf
    depends_on:
      - app
    links:
      - app
    ports:
      - "8082:80"
now in our file we define the two apps and we say that the proxy app depends on the first app let see the result :
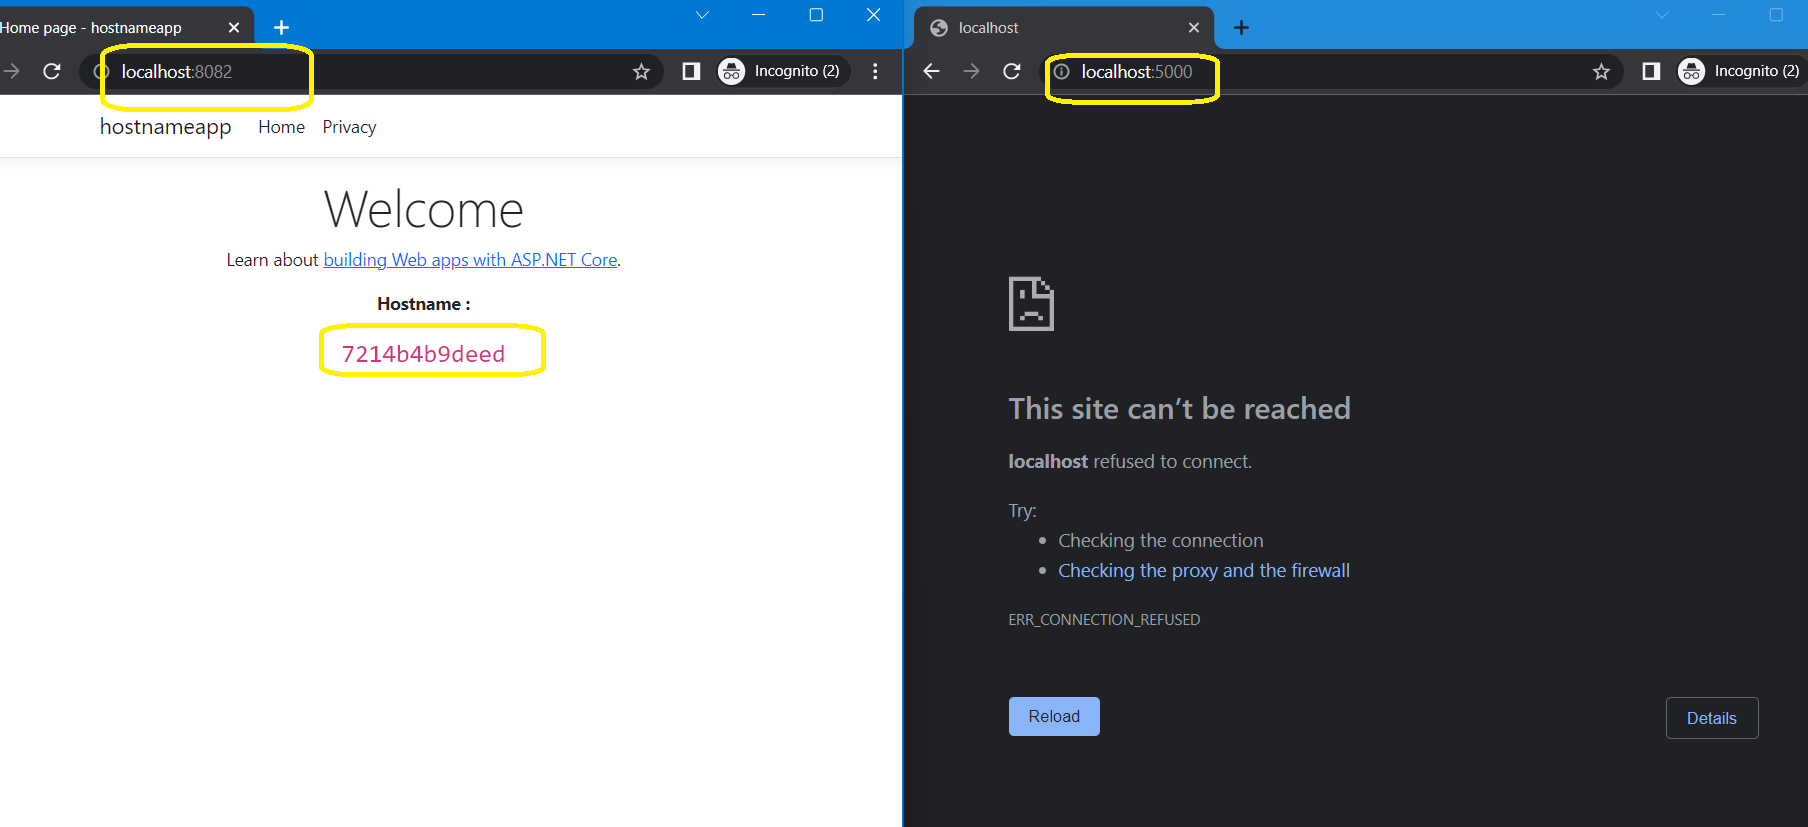 and this is our goal , we want the backend not to be exposed to public and we want our frontend exposed as you can see on port 8082 and we can not acces the backend , now if we modify the config file and add different backends with different port the load balancer will play it’s role to manage the traffic between the apps .
Now if we have the same app on different port and we edit the config file like this ofr example :
worker_processes 4;

events { worker_connections 1024; }

http {
    sendfile on;

    upstream app_servers {
        server app:5000 weight=4;
        server app2:5010 weight=2;
    }

    server {
        listen 80;

        location / {
            proxy_pass         http://app_servers;
            proxy_redirect     off;
            proxy_set_header   Host $host;
            proxy_set_header   X-Real-IP $remote_addr;
            proxy_set_header   X-Forwarded-For $proxy_add_x_forwarded_for;
            proxy_set_header   X-Forwarded-Host $server_name;
        }
    }
}
the result will show that we balance between the two apps

that’s it for this demo , in next post we will discuss how we will do this on Azure Kubernetes Service (AKS) .
source code : https://bit.ly/3EDJVus


Comments 6