
What Is Blazor ?
Blazor is a new experimental web UI framework from the ASP.NET team that aims to brings .NET applications into all browsers (including mobile) via WebAssembly. It allows you to build true full-stack .NET applications, sharing code across server and client, with no need for transpilation or plugins.
So ,Blazor is a web framework that, in short, allows you to write C# and HTML to create client-side single-page applications.
This tutorial will take you through installing Visual studio preview,blazor template, setting up your Blazor app, and interacting with new APIs via swagger.
Youtube Video
Setup
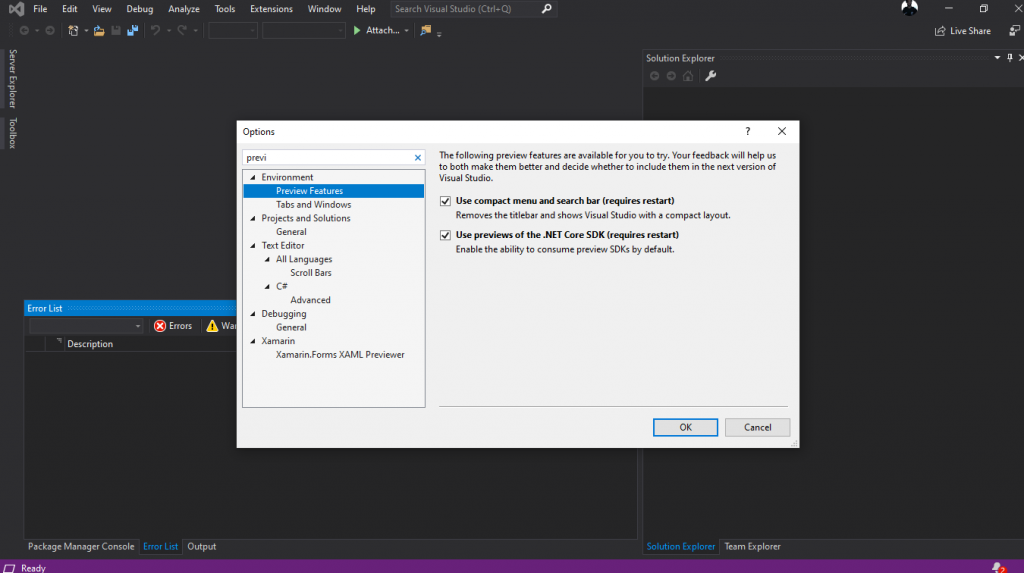
First we need to ensure that Visual Studio allows preview versions of .NET Core SDK . In Visual Studio navigate to Tools > Options, make sure the option underlined below turned ON.
Next we need to install the newest template from this Link . or all you need to do is to open CMD or power shell and Excute this commande :
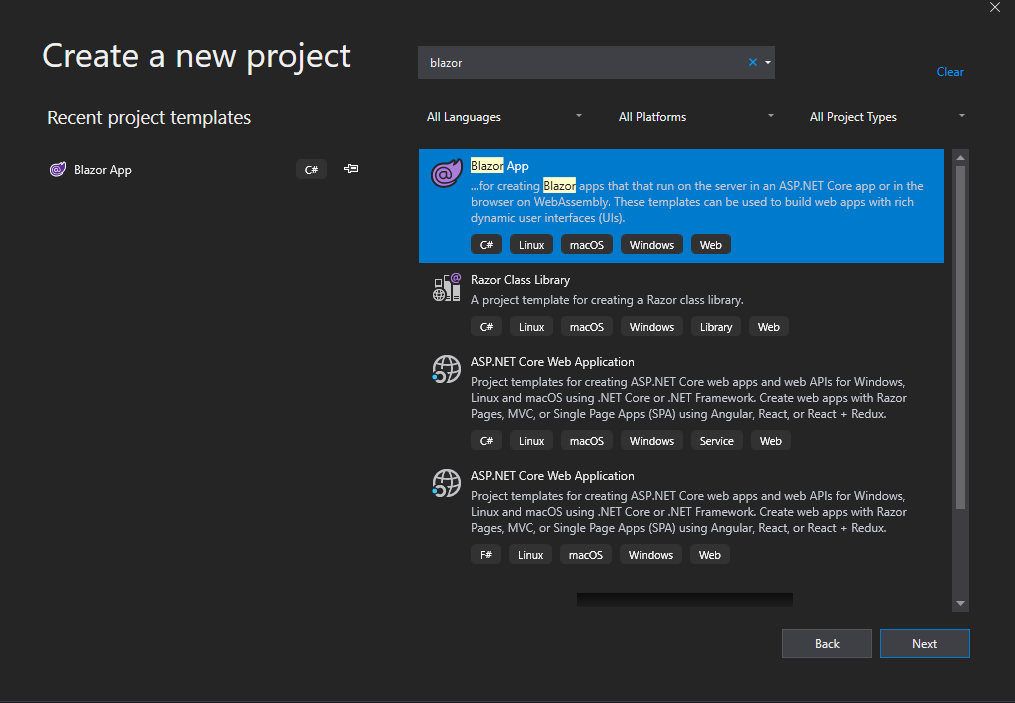
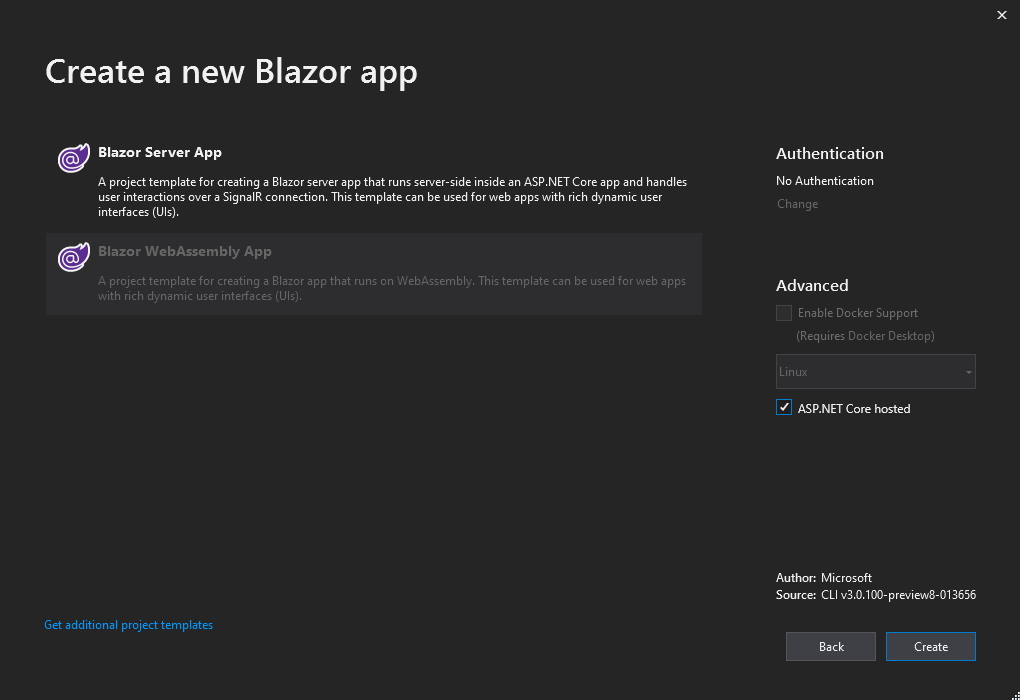
dotnet new -i Microsoft.AspNetCore.Blazor.Templates::3.0.0-preview8.19405.7 Now , we have our Blazor template installed , let’s create our Project :
Demo App
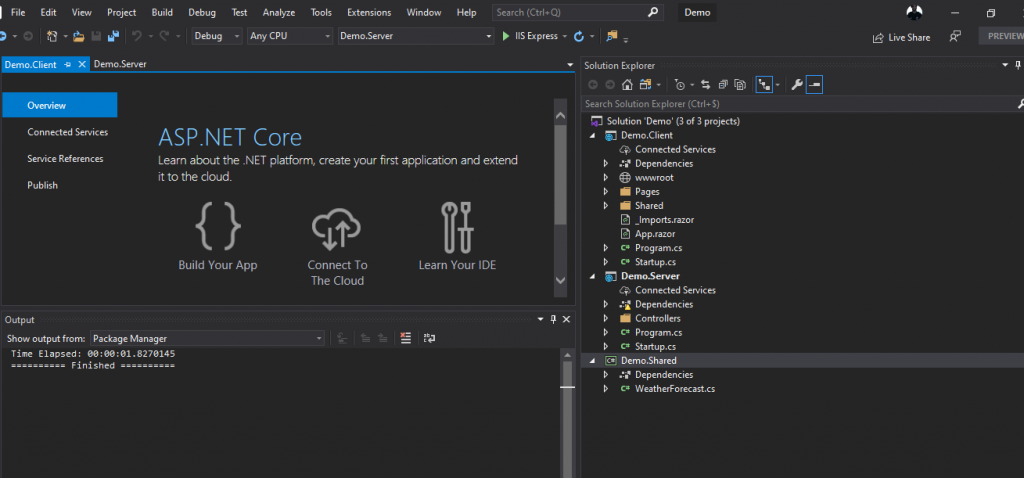
As you can see we Have three projects , Client ,Server and Shared . Now we need to install some Nugets to use EF core and present our Api in a beautiful way .
Entity Framework (EF) Core
Entity Framework (EF) Core is Microsoft’s cross platform Object Relational Mapper (ORM). EF Core provides abstractions over different data stores and manages database resources automatically. EF Core targets .NET Core, meaning it’s cross platform, it can run on Windows, Mac and Linux. EF Core shouldn’t be confused with regular Entity Framework (EF), the older .NET Framework version. Every web app needs a data source, and EFCore is a great way to interact with a SQL database. So lets walk through the process of adding EF Core to our new Blazor Demo App.
Make sure to check the preview as in picture below :
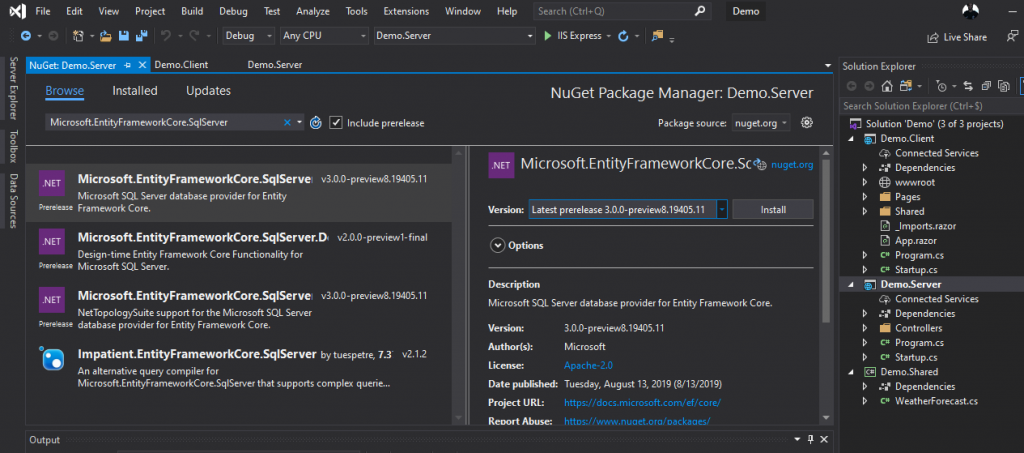
Or you just can use The Package manager console to install :
Install-Package Microsoft.EntityFrameworkCore.SqlServer Install-Package Microsoft.EntityFrameworkCore.Tools Swashbuckle.AspNetCore Let’s Code First , let’s Add our Model to our Demo.shared Project :
public class Persons
{
public int ID { get; set; }
public string Name { get; set; }
public string Age { get; set; }
public bool Visible { get; set; }
public string Urd { get; set; }

}
Now , We need to add the DB context to our Server project
public class PersondbContext : DbContext
{
public PersondbContext(DbContextOptions<PersondbContext> options) : base(options)
{
}
public DbSet<Persons> Person { get; set; }
}
Next , inside startup we need to add a couple of lines :
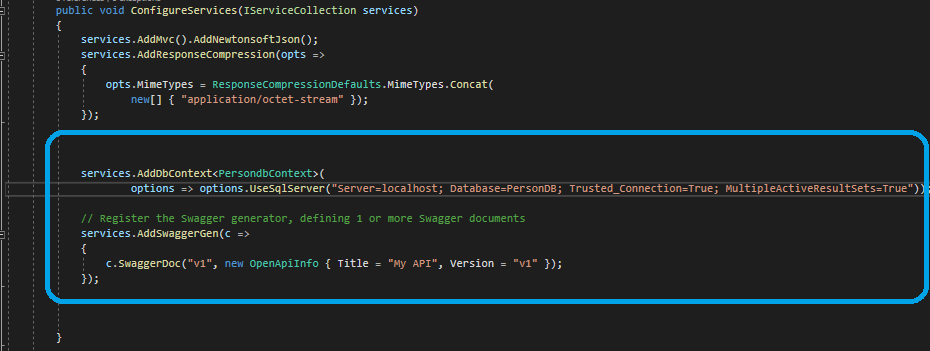
services.AddDbContext<PersondbContext>(
options => options.UseSqlServer("Server=localhost; Database=PersonDB; Trusted_Connection=True; MultipleActiveResultSets=True"));
// Register the Swagger generator, defining 1 or more Swagger documents
services.AddSwaggerGen(c =>
{
c.SwaggerDoc("v1", new OpenApiInfo { Title = "My API", Version = "v1" });
});
And , inside Configure Method we have to Enable swagger
// Enable middleware to serve generated Swagger as a JSON endpoint.
app.UseSwagger();
// Enable middleware to serve swagger-ui (HTML, JS, CSS, etc.),
// specifying the Swagger JSON endpoint.
app.UseSwaggerUI(c =>
{
c.SwaggerEndpoint("/swagger/v1/swagger.json", "My API V1");
});
Now , we have to update our database using migrations .
Enable-Migrations: Enables Code First Migrations in a project. Add-Migration: Scaffolds a migration script for any pending model changes. Update-Database: Applies any pending migrations to the database. Get-Migrations: Displays the migrations that have been applied to the target database. Add-migrations DemoApp Update-database After this , we need to create our controller :
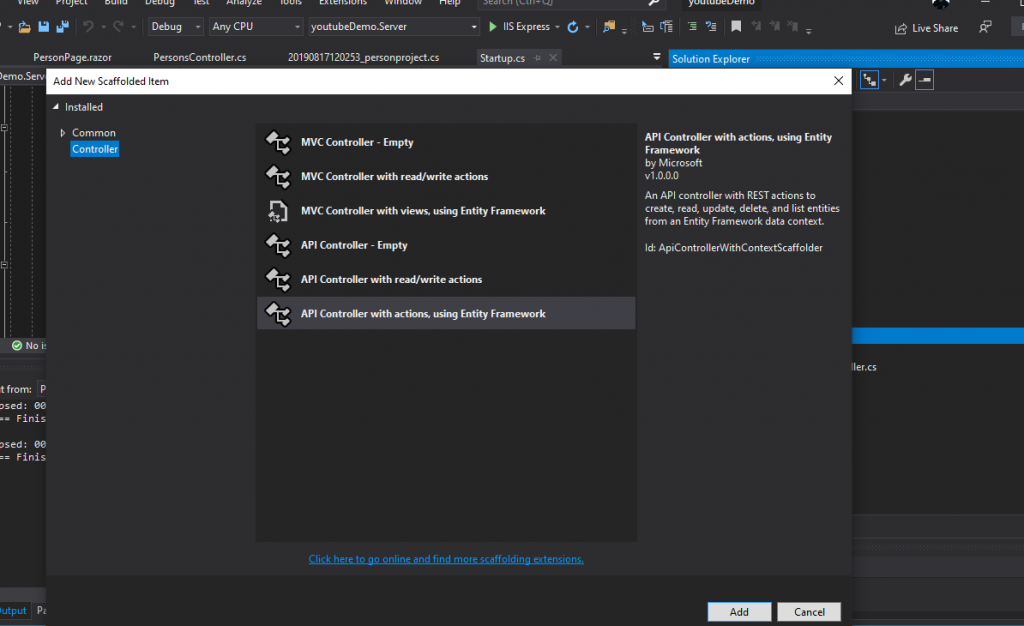
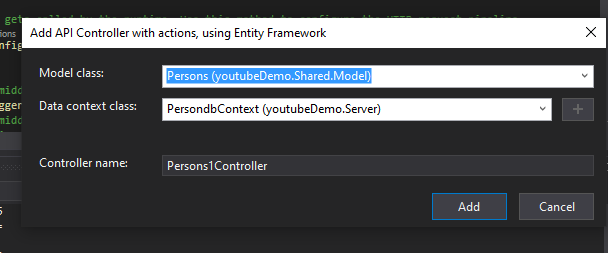
And now we will have our controller published .
using System;
using System.Collections.Generic;
using System.Linq;
using System.Threading.Tasks;
using Microsoft.AspNetCore.Http;
using Microsoft.AspNetCore.Mvc;
using Microsoft.EntityFrameworkCore;
using youtubeDemo.Server;
using youtubeDemo.Shared.Model;
namespace youtubeDemo.Server.Controllers {
[Route("api/[controller]")]
[ApiController]
public class PersonsController: ControllerBase {
private readonly PersondbContext _context;
public PersonsController(PersondbContext context) {
_context = context;
}
// GET: api/Persons
[HttpGet]
public async Task < ActionResult < IEnumerable < Persons >>> GetExperience() {
return await _context.Experience.ToListAsync();
}
// GET: api/Persons/5
[HttpGet("{id}")]
public async Task < ActionResult < Persons >> GetPersons(int id) {
var persons = await _context.Experience.FindAsync(id);
if (persons == null) {
return NotFound();
}
return persons;
}
// PUT: api/Persons/5

[HttpPut("{id}")]
public async Task < IActionResult > PutPersons(int id, Persons persons) {
if (id != persons.ID) {
return BadRequest();
}

_context.Entry(persons).State = EntityState.Modified;
try {
await _context.SaveChangesAsync();
} catch (DbUpdateConcurrencyException) {
if (!PersonsExists(id)) {
return NotFound();
} else {
throw;
}
}
return NoContent();
}
// POST: api/Persons
[HttpPost]
public async Task < ActionResult < Persons >> PostPersons(Persons persons) {
_context.Experience.Add(persons);
await _context.SaveChangesAsync();
return CreatedAtAction("GetPersons", new {
id = persons.ID
}, persons);
}
// DELETE: api/Persons/5
[HttpDelete("{id}")]
public async Task < ActionResult < Persons >> DeletePersons(int id) {
var persons = await _context.Experience.FindAsync(id);
if (persons == null) {
return NotFound();
}
_context.Experience.Remove(persons);
await _context.SaveChangesAsync();
return persons;
}
private bool PersonsExists(int id) {
return _context.Experience.Any(e => e.ID == id);
}
}
}
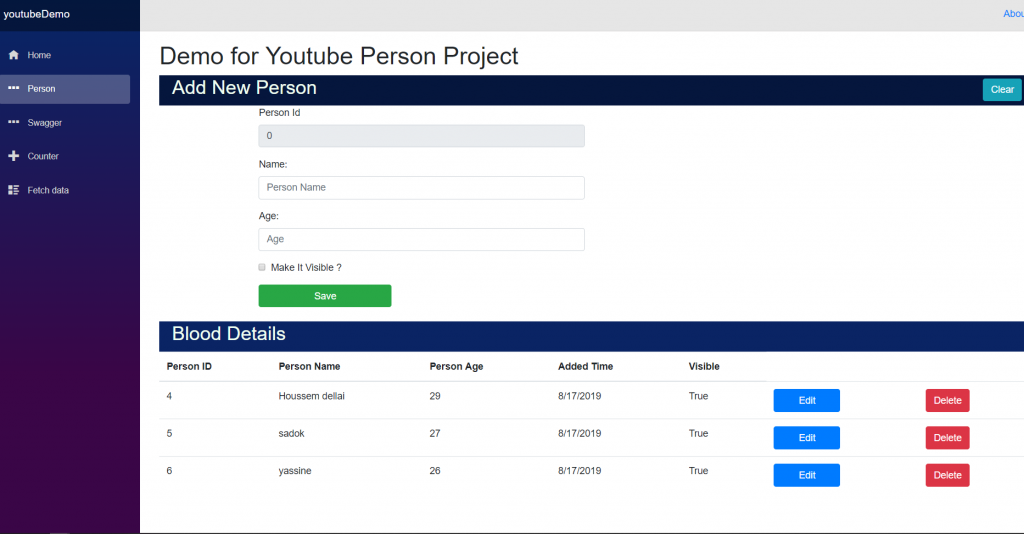
Now we need to create our PersonPage.razor
@page “/PersonPage” @using youtubeDemo.Client.Shared @using youtubeDemo.Shared.Model @inject HttpClient Http @using System.Linq
<h1>Demo for Youtube Person Project</h1>
<table width="100%" style="background:#05163D;color:honeydew">
<tr>
<td width="20"> </td>
<td>
<h2> Add New Person </h2>
</td>
<td> </td>
<td align="right">
<button class="btn btn-info" @onclick="(async () => await AddNewPerson())">Clear</button>
</td>
<td width="10"> </td>
</tr>
<tr>
<td colspan="2"></td>
</tr>
</table>
<div class="container">
<div class="row">
<div class="col-6">
<form>
<div class="form-group">
<label for="email">Person Id</label>
<input type="text" class="form-control" @bind="PersonG.ID" readonly />
</div>
<div class="form-group">
<label for="Person">Name:</label>
<input type="text" class="form-control" @bind="PersonG.Name" placeholder="Person Name" />
</div>
<div class="form-group">
<label for="pwd"> Age:</label>
<input type="text" class="form-control" @bind="PersonG.Age" placeholder="Age" />
</div>
<div class="form-group form-check">
<label class="form-check-label">
<input type="checkbox" @bind="PersonG.Visible" class="form-check-input" />Make It Visible ?
</label>
</div>
<div class="form-group" hidden>
<label for="IsVisible">IsVisible</label>
<input type="text" class="form-control" bind="@PersonG.Visible.ToString()" value="@PersonG.Visible.ToString()" readonly />
</div>
<button type="button" class="btn btn-success" @onclick="(async () => await AddPerson())" style="width:220px;">Save</button>
</form>
</div>
</div>
</div>
<br />
<table width="100%" style="background:#0A2464;color:honeydew">
<tr>
<td width="20"> </td>
<td>
<h2>Blood Details</h2>
</td>
</tr>
<tr>
<td colspan="2"></td>
</tr>
</table>
@if (Person == null)
{
<p><em>Loading...</em></p>
}
else
{
<table class="table">
<thead>
<tr>
<th>Person ID</th>
<th>Person Name</th>
<th>Person Age</th>
<th>Added Time</th>
<th>Visible</th>
</tr>
</thead>
<tbody>
@foreach (var _Person in Person)
{
<tr>
<td>@_Person.ID</td>
<td>@_Person.Name</td>
<td>@_Person.Age</td>
<td>@_Person.Urd</td>
<td>@_Person.Visible</td>
<td><button class="btn btn-primary" @onclick="@(async () => await EditPerson(@_Person.ID))" style="width:110px;">Edit</button></td>
<td><button class="btn btn-danger" @onclick="@(async () => await DeletePerson(@_Person.ID))">Delete</button></td>
</tr>
}
</tbody>
</table>
}
@functions {
Persons[] Person;
Persons PersonG = new Persons();
string ids = "0";
bool showAddrow = false;
protected override async Task OnInitializedAsync()
{
Person = await Http.GetJsonAsync<Persons[]>("/api/Persons/");
}
async Task AddNewPerson()
{
PersonG = new Persons();
}
// Add New Blood Details Method
async Task AddPerson()
{
PersonG.Urd = (System.DateTime.Now).ToShortDateString().ToString();
if (PersonG.ID == 0)
{
await Http.SendJsonAsync(HttpMethod.Post, "/api/Persons/", PersonG);
}
else
{
await Http.SendJsonAsync(HttpMethod.Put, "/api/Persons/" + PersonG.ID, PersonG);
}
PersonG = new Persons();
Person = await Http.GetJsonAsync<Persons[]>("/api/Persons/");
}
// Edit Method
protected async Task EditPerson(int Id)
{
ids = Id.ToString();
PersonG = await Http.GetJsonAsync<Persons>("/api/Persons/" + Convert.ToInt32(Id));
}
// Delte Method
protected async Task DeletePerson(int Id)
{
ids = Id.ToString();
await Http.DeleteAsync("/api/Persons/" + Convert.ToInt32(Id));
Person = await Http.GetJsonAsync<Persons[]>("/api/Persons/");
}
}
our page is ready now , we have to add it to our menu inside NavMenu.razor :
<li class="nav-item px-3">
<NavLink class="nav-link" href="/PersonPage">
<span class="oi oi-ellipses" aria-hidden="true"></span> Person
</NavLink>
</li>
Now , if you start the project or use command Dotnet run you can run the project :

Links :
Demo Person Project : https://github.com/achrafbenalaya/DemoPersonAppYoutube
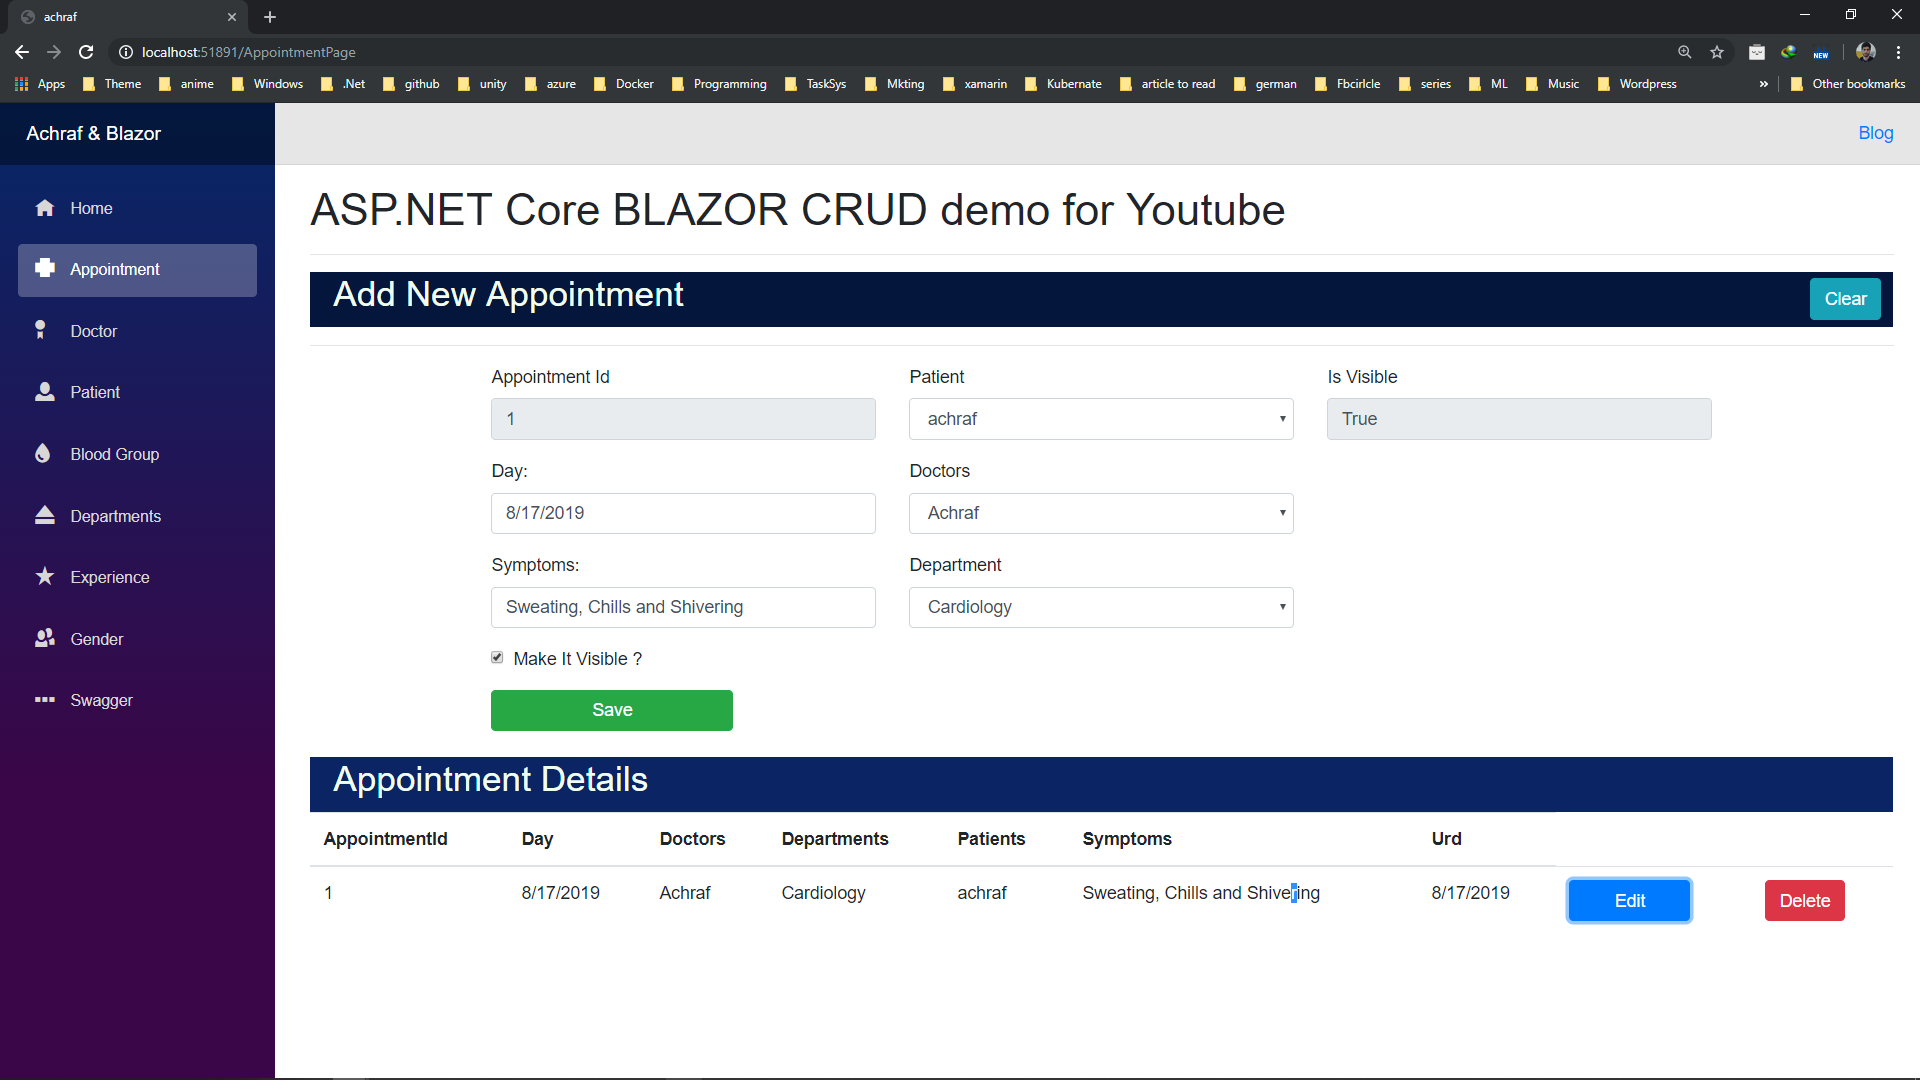
Patient Project presented in demo : https://github.com/achrafbenalaya/BlazorAppointmentAppYoutubeDemo
Happy Blazor Day =)


I am not sure where you’re getting your info, but great topic. I needs to spend some time learning much more or understanding more.
Thanks for fantastic info I was looking for this information for my mission.